
Underwater Fiber Optic Connectors: Complete Installation, Testing & Maintenance Guide 2026
Executive Summary
Underwater fiber optic connectors represent the critical interface enabling high-bandwidth subsea communications across telecommunications, offshore energy, scientific research, and defense applications. This comprehensive technical guide provides engineers, installers, and maintenance professionals with detailed procedures, best practices, and troubleshooting methodologies for fiber optic connector systems in underwater environments.
Key Technical Specifications:
| Parameter | Single-Mode | Multi-Mode |
|---|---|---|
| Wavelength | 1310/1550 nm | 850/1300 nm |
| Core Diameter | 9 μm | 50/62.5 μm |
| Insertion Loss (Typical) | <0.3 dB | <0.5 dB |
| Return Loss | >55 dB | >45 dB |
| Operating Depth | Up to 7,000m | Up to 3,000m |
Guide Highlights:
- Complete installation procedures for wet-mate and dry-mate connectors
- Step-by-step testing protocols with acceptance criteria
- Preventive maintenance schedules and procedures
- Troubleshooting flowcharts for common failure modes
- Safety considerations and best practices
Chapter 1: Fiber Optic Connector Fundamentals
1.1 Connector Types and Applications
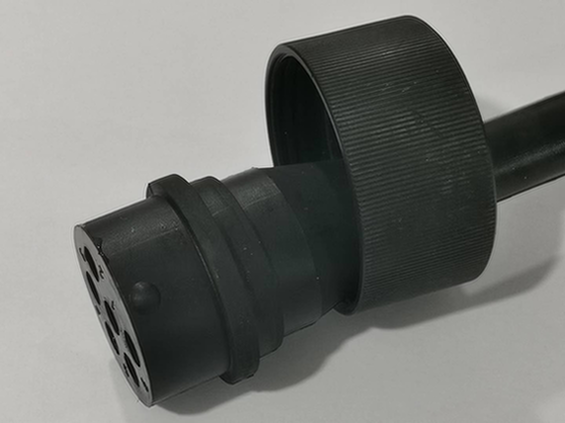
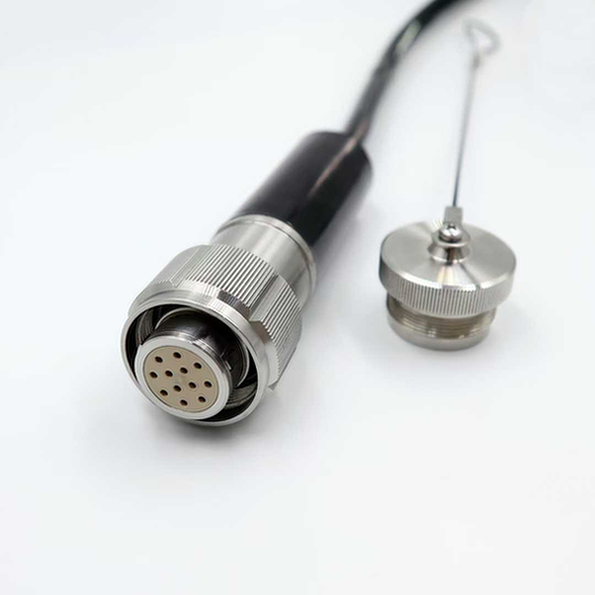
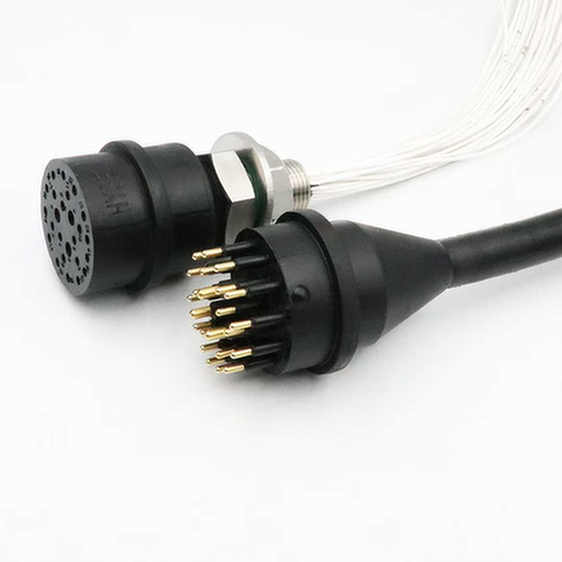
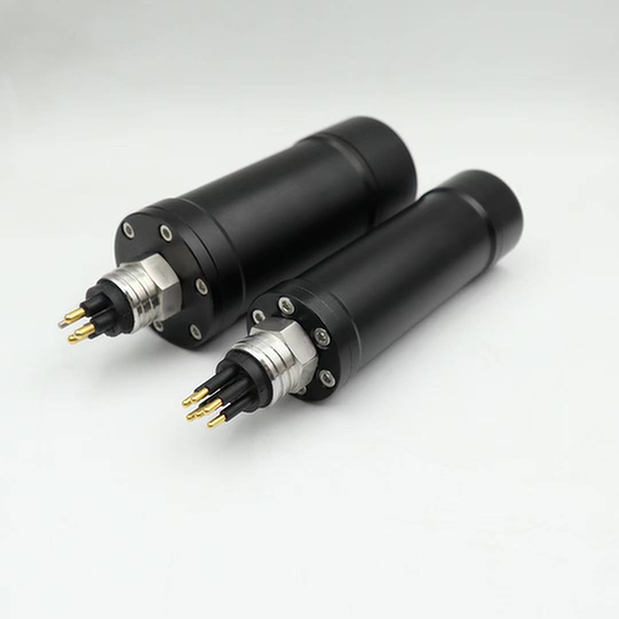
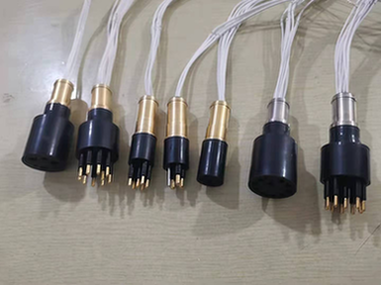
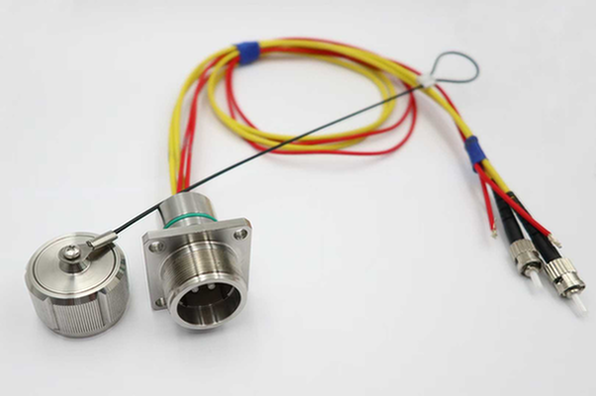
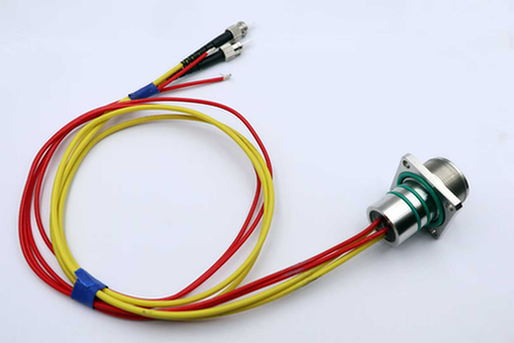
Dry-Mate Fiber Optic Connectors:
Dry-mate connectors are designed for connection in dry environments before submersion. These connectors offer superior optical performance but require recovery to surface or dry habitat for mating operations.
Typical Applications:
– Submarine cable terminations
– Subsea equipment manufacturing
– Permanent installations
– Laboratory and testing environments
Performance Characteristics:
| Parameter | Specification |
|---|---|
| Insertion Loss | <0.2 dB typical |
| Return Loss | >60 dB typical |
| Operating Pressure | Up to 1,000 bar |
| Temperature Range | -40°C to +85°C |
| Mating Cycles | >500 cycles |
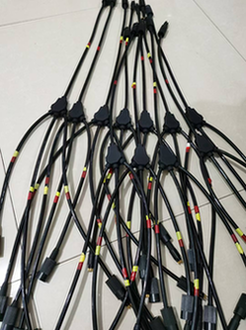
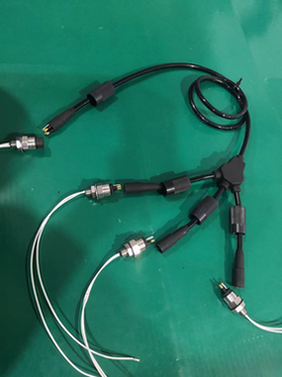
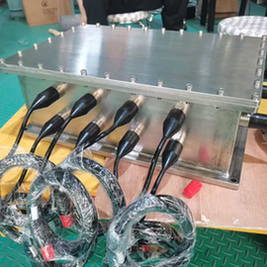
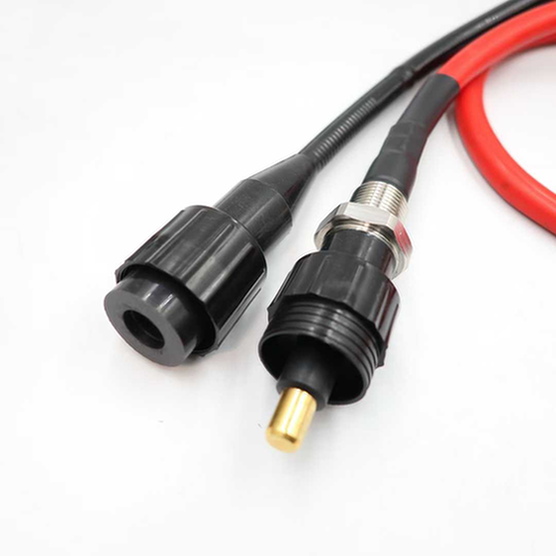
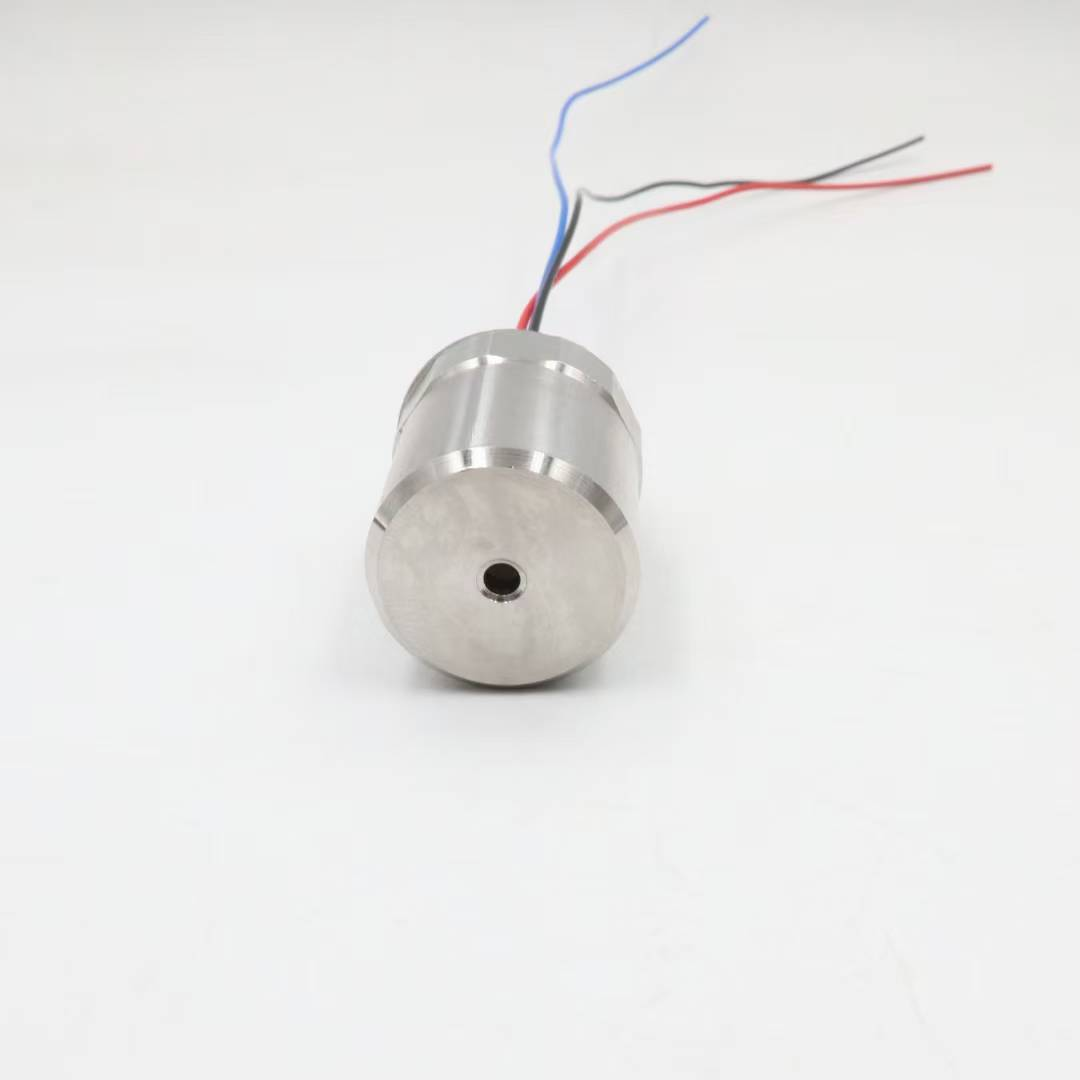
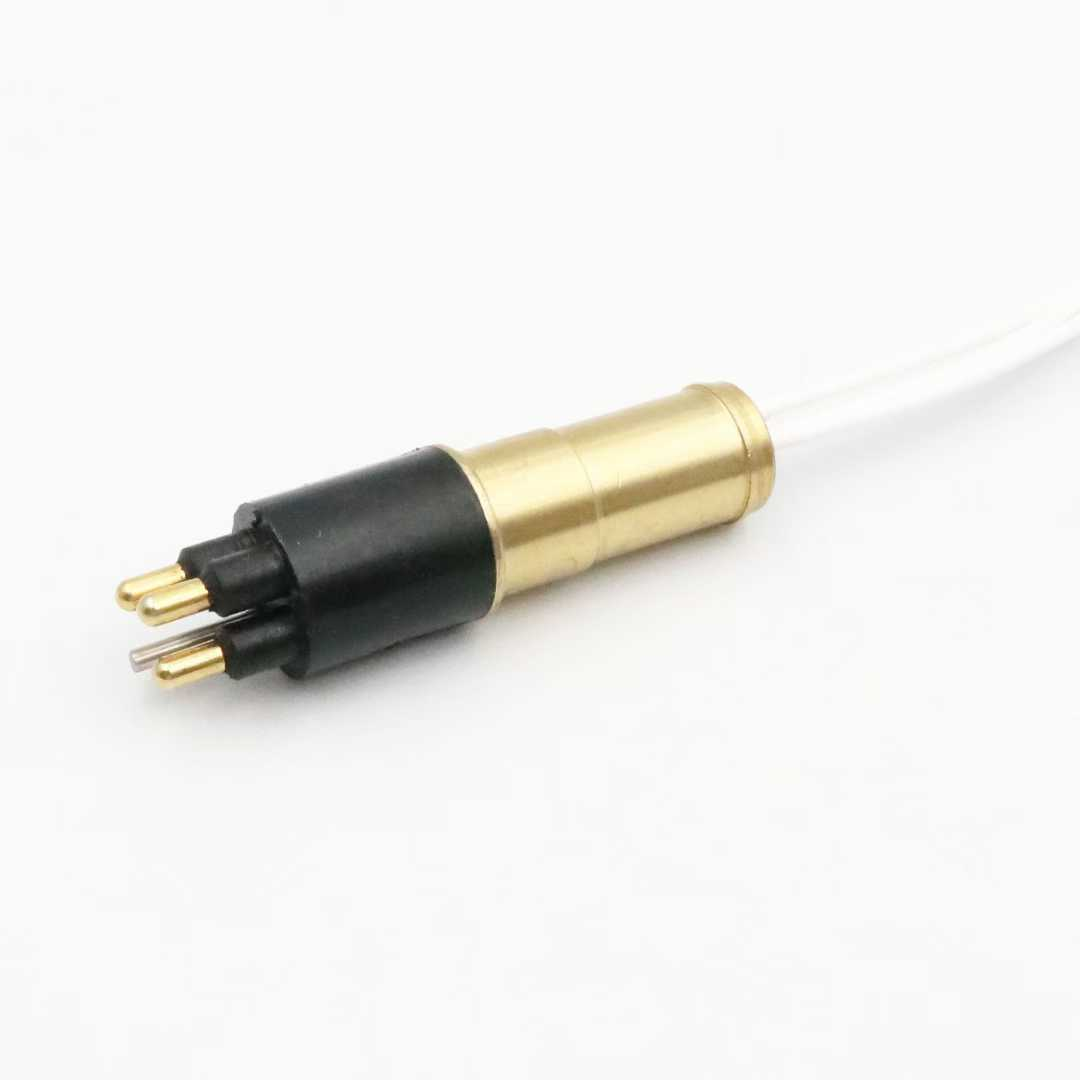
Wet-Mate Fiber Optic Connectors:
Wet-mate connectors enable underwater connection and disconnection by divers or ROVs without requiring dry conditions. This capability is essential for:
- ROV tool changes
- Subsea system reconfiguration
- Emergency repairs
- Modular system expansion
Performance Characteristics:
| Parameter | Specification |
|---|---|
| Insertion Loss | <0.5 dB typical |
| Return Loss | >50 dB typical |
| Operating Depth | Up to 4,000m |
| Mating Time | 3-10 minutes |
| Mating Cycles | >100 cycles |
1.2 Optical Fiber Types for Underwater Applications
Single-Mode Fiber (SMF):
Single-mode fiber is the standard for long-distance subsea communications, offering lowest attenuation and highest bandwidth capabilities.
Specifications:
– Core diameter: 8-10 μm
– Cladding diameter: 125 μm
– Attenuation: 0.18 dB/km @ 1550 nm
– Bandwidth: Effectively unlimited for practical distances
– Applications: Submarine cables, long-distance links (>10 km)
Multi-Mode Fiber (MMF):
Multi-mode fiber is used for shorter-distance applications where cost is a primary consideration.
Specifications:
– Core diameter: 50 or 62.5 μm
– Cladding diameter: 125 μm
– Attenuation: 0.8 dB/km @ 850 nm
– Bandwidth: 200-2000 MHz·km
– Applications: ROV tethering, short subsea links (<2 km)
Specialty Fibers:
Radiation-Hardened Fiber:
– Enhanced resistance to radiation-induced attenuation
– Applications: Nuclear facilities, space applications
Bend-Insensitive Fiber:
– Reduced macrobend and microbend losses
– Applications: Tight-radius installations, dynamic cables
Chapter 2: Installation Procedures
2.1 Pre-Installation Preparation
Site Survey and Planning:
- Environmental Assessment
- Water depth and pressure conditions
- Temperature range and thermal gradients
- Current velocities and directions
- Seabed composition and stability
- Marine growth potential
- Access and Logistics
- Vessel requirements and availability
- ROV/diver access capabilities
- Weather window considerations
- Emergency response procedures
- Equipment Verification
- Connector compatibility confirmation
- Tool calibration verification
- Spare parts inventory
- Test equipment readiness
Safety Briefing:
All personnel must receive comprehensive safety briefing covering:
– Underwater work hazards
– Equipment handling procedures
– Emergency protocols
– Communication procedures
– Environmental protection requirements
2.2 Dry-Mate Connector Installation
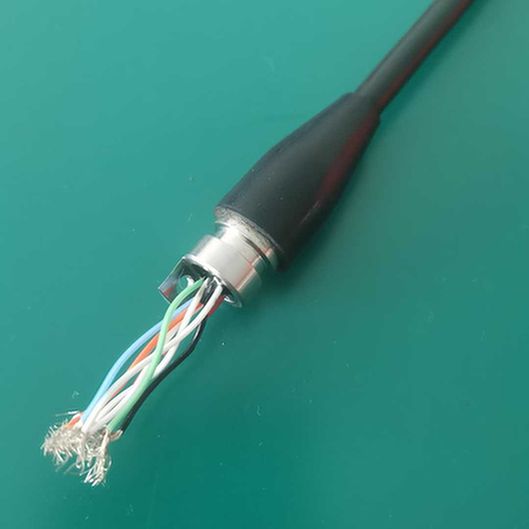
Step 1: Cable Preparation
- Cut cable to required length using precision cable cutter
- Remove outer jacket using jacket stripping tool (avoid fiber damage)
- Clean exposed fibers with lint-free wipes and approved solvent
- Inspect fibers under microscope for defects
معايير القبول:
– No fiber nicks or scratches visible at 200x magnification
– Fiber length within specified tolerance (±0.5 mm)
– Clean fiber surface (no residue or contamination)
Step 2: Connector Assembly
- Apply coupling agent to fiber end (if specified)
- Insert fiber into connector ferrule
- Secure fiber using epoxy or mechanical crimp
- Cure epoxy according to manufacturer specifications
- Polish connector end-face to required finish
Polishing Sequence:
– Rough polish: 30 μm film (remove excess epoxy)
– Medium polish: 12 μm film (shape end-face)
– Fine polish: 3 μm film (smooth surface)
– Final polish: 0.3 μm film (optical finish)
Step 3: Connector Testing
- Visual inspection under microscope (200x minimum)
- Insertion loss measurement using light source and power meter
- Return loss measurement using OTDR or return loss meter
- Documentation of test results
معايير القبول:
– Insertion loss: <0.3 dB (single-mode), <0.5 dB (multi-mode)
– Return loss: >55 dB (single-mode), >45 dB (multi-mode)
– No visible defects under microscopic inspection
2.3 Wet-Mate Connector Installation
ROV-Based Installation:
- ROV Preparation
- Install appropriate tooling package
- Verify manipulator functionality
- Test camera and lighting systems
- Confirm communication links
- Connector Approach
- Navigate ROV to work site
- Position for optimal manipulator access
- Establish stable hover or seabed contact
- Verify visual contact with connection point
- Connection Procedure
- Engage connector guide mechanism
- Apply mating force within specified range
- Verify locking mechanism engagement
- Confirm connection status (visual or sensor feedback)
- Post-Connection Verification
- Perform optical continuity test
- Measure insertion loss (if equipment available)
- Document connection with video recording
- Report completion to surface
Diver-Based Installation:
- Diver Preparation
- Review work procedures and safety briefings
- Inspect diving equipment and tools
- Verify communication systems
- Establish dive plan and contingency procedures
- Underwater Work
- Descend to work depth following decompression plan
- Establish work position and stability
- Execute connection procedure per training
- Maintain constant communication with surface
- Connection Verification
- Visual confirmation of mating
- Tactile verification of lock engagement
- Report status to surface supervisor
- Document with underwater camera if available
2.4 Cable Termination Procedures
Submarine Cable Landing:
- Cable Recovery
- Retrieve cable end from seabed
- Secure cable on work platform
- Remove protective end cap
- Inspect cable condition
- Termination Assembly
- Strip cable layers per manufacturer specifications
- Prepare optical fibers for connectorization
- Install strength member terminations
- Apply environmental seals
- Testing and Documentation
- Perform end-to-end optical testing
- Document all test results
- Label and identify all connections
- Complete as-built documentation
Chapter 3: Testing and Verification
3.1 Visual Inspection
Microscopic Inspection:
All fiber optic connectors must undergo microscopic inspection before and after installation.
Inspection Equipment:
– Video microscope (200x minimum magnification)
– Handheld inspection microscope (field use)
– Automated inspection systems (high-volume)
Inspection Criteria (IEC 61300-3-35):
| Defect Type | Acceptable Limit |
|---|---|
| Scratches | Width <2 μm, Length <50 μm |
| Pits | Diameter <5 μm, Max 3 per zone |
| Contamination | None in core region |
| Cracks | None acceptable |
| Chips | <10 μm at cladding edge only |
Inspection Zones:
- Zone A (Core): 0-25 μm radius – No defects acceptable
- Zone B (Cladding): 25-62.5 μm radius – Minor defects acceptable
- Zone C (Contact): 62.5-125 μm radius – Moderate defects acceptable
- Zone D (Outside): >125 μm radius – Most defects acceptable
3.2 Insertion Loss Testing
Test Methods:
Method 1: Light Source and Power Meter (LSPM)
Most accurate method for insertion loss measurement.
الإجراء:
1. Calibrate test equipment with reference cables
2. Connect light source to one end of link
3. Connect power meter to opposite end
4. Record power reading
5. Calculate loss: Loss (dB) = Reference Power – Measured Power
معايير القبول:
– Single-mode: <0.3 dB per connection
– Multi-mode: <0.5 dB per connection
– Total link loss: Per system design specification
Method 2: Optical Time Domain Reflectometer (OTDR)
Provides distributed loss measurement and fault location.
الإجراء:
1. Connect OTDR to one end of fiber
2. Configure test parameters (wavelength, pulse width, range)
3. Acquire trace and analyze events
4. Document loss at each connection point
5. Identify and locate any anomalies
OTDR Settings:
| Parameter | Single-Mode | Multi-Mode |
|---|---|---|
| Wavelength | 1310/1550 nm | 850/1300 nm |
| Pulse Width | 10-100 ns | 10-50 ns |
| Range | 2x fiber length | 2x fiber length |
| Averaging | 30-60 seconds | 15-30 seconds |
3.3 Return Loss Testing
Test Methods:
Method 1: Optical Continuous Wave Reflectometer (OCWR)
Provides accurate return loss measurement for installed links.
الإجراء:
1. Connect OCWR to fiber under test
2. Allow instrument to stabilize
3. Record return loss reading
4. Compare against acceptance criteria
معايير القبول:
– Single-mode: >55 dB
– Multi-mode: >45 dB
– APC connectors: >65 dB
Method 2: OTDR Return Loss Measurement
OTDR can estimate return loss from reflection events.
الإجراء:
1. Acquire OTDR trace with appropriate settings
2. Identify reflection events (connectors, breaks)
3. Measure reflection magnitude
4. Calculate return loss from reflection coefficient
3.4 End-to-End Link Testing
Complete Link Verification:
- Optical Power Budget Analysis
- Calculate total expected loss
- Compare with measured loss
- Verify margin requirements met
- Bit Error Rate Testing (BERT)
- Connect BERT equipment to link ends
- Transmit test pattern at system rate
- Measure error rate over test period
- Verify BER meets specification (<10⁻¹² typical)
- System Performance Testing
- Connect actual transmission equipment
- Verify link establishment
- Monitor performance metrics
- Confirm error-free operation
Chapter 4: Maintenance Procedures
4.1 Preventive Maintenance Schedule
Routine Inspections:
| Frequency | Activity | Responsibility |
|---|---|---|
| Monthly | Visual inspection (remote) | Operations team |
| Quarterly | Performance data review | Engineering team |
| Annually | Physical inspection (if accessible) | Maintenance team |
| 3 Years | Comprehensive testing | Specialist team |
| 5 Years | Connector replacement consideration | Asset management |
Performance Monitoring:
Continuous monitoring parameters:
– Optical power levels (transmit and receive)
– Bit error rate statistics
– Alarm and event logs
– Environmental conditions (if sensors available)
4.2 Connector Cleaning Procedures
Dry Cleaning Method:
For light contamination removal.
الإجراء:
1. Inspect connector end-face
2. Use dry lint-free cleaning swab
3. Wipe end-face in single direction
4. Re-inspect to verify cleanliness
5. Repeat if necessary
Wet Cleaning Method:
For stubborn contamination.
الإجراء:
1. Apply approved cleaning solvent to swab
2. Wipe end-face gently (single direction)
3. Use dry swab to remove solvent residue
4. Allow to air dry (30 seconds minimum)
5. Inspect to verify cleanliness
Cleaning Verification:
All cleaned connectors must pass microscopic inspection before reconnection.
4.3 Connector Replacement Procedures
When to Replace:
- Insertion loss exceeds specification by >0.2 dB
- Return loss degrades by >10 dB from baseline
- Visible damage to end-face or housing
- Failed cleaning attempts
- Exceeded mating cycle rating
Replacement Steps:
- Preparation
- Obtain replacement connector
- Gather required tools and equipment
- Review replacement procedure
- Brief team on work plan
- Removal
- Disconnect fiber from system
- Remove damaged connector
- Inspect cable for damage
- Prepare cable for new connector
- Installation
- Install new connector per manufacturer instructions
- Polish end-face to required specification
- Clean and inspect end-face
- Test optical performance
- Verification
- Perform insertion loss test
- Perform return loss test
- Document replacement in maintenance records
- Update asset database
Chapter 5: Troubleshooting
5.1 Common Failure Modes
High Insertion Loss:
Possible Causes:
– Contaminated end-faces
– Misaligned connectors
– Damaged fibers
– Poor polish quality
– Incompatible connector types
Diagnostic Steps:
1. Inspect end-faces microscopically
2. Clean connectors and retest
3. Verify connector compatibility
4. Check for fiber damage
5. Replace connector if necessary
High Return Loss:
Possible Causes:
– Air gap at connection
– Damaged end-face
– Incorrect connector type (UPC vs APC)
– Poor polish quality
Diagnostic Steps:
1. Verify connector type match
2. Inspect end-face quality
3. Check connection seating
4. Re-polish or replace connector
Intermittent Connection:
Possible Causes:
– Loose connection
– Damaged locking mechanism
– Cable strain
– Environmental stress
Diagnostic Steps:
1. Verify connection security
2. Inspect locking mechanism
3. Check cable strain relief
4. Monitor while manipulating cable
5. Replace connector or cable as needed
5.2 Troubleshooting Flowchart
Problem: No Optical Signal
│
├─ Check transmit equipment power → If OFF, restore power
│
├─ Verify fiber continuity with visual fault locator
│  │
│  ├─ Break found → Locate and repair/replace
│  │
│  └─ No break → Continue diagnostics
│
├─ Test with known-good patch cable
│  │
│  ├─ Signal restored → Original cable faulty
│  │
│  └─ No signal → Continue diagnostics
│
├─ Inspect all connectors in link
│  │
│  ├─ Contamination found → Clean and retest
│  │
│  └─ Clean → Continue diagnostics
│
└─ Replace components systematically until fault isolated
5.3 Emergency Repair Procedures
Underwater Emergency Repair:
- Assessment
- Identify fault location (OTDR)
- Assess environmental conditions
- Determine repair method (diver vs ROV)
- Mobilize required resources
- Cable Recovery
- Locate cable on seabed
- Recover sufficient length for repair
- Secure cable on work platform
- Protect from environmental damage
- Splice Repair
- Cut out damaged section
- Prepare fiber ends for splicing
- Perform fusion splice (if equipment available)
- Or install mechanical splice
- Protect splice with housing
- Testing and Restoration
- Test repaired link
- Verify performance meets requirements
- Return cable to seabed
- Document repair
Chapter 6: Safety Considerations
6.1 Laser Safety
Hazard Classification:
Most fiber optic test equipment uses Class 1 or Class 3R lasers.
Safety Precautions:
– Never look directly into fiber ends
– Use laser safety glasses when working with high-power systems
– Post warning signs during testing
– Follow equipment manufacturer safety guidelines
6.2 Underwater Work Safety
Diver Safety:
– Follow established diving procedures
– Maintain communication with surface
– Monitor dive time and decompression requirements
– Have standby diver ready
– Ensure emergency equipment available
ROV Safety:
– Verify ROV certification and inspection
– Maintain safe distance from other operations
– Monitor tether management
– Have recovery procedures ready
6.3 Environmental Protection
Best Practices:
– Minimize seabed disturbance
– Avoid damage to marine life
– Proper disposal of waste materials
– Report environmental incidents
– Follow local environmental regulations
الخاتمة
Proper installation, testing, and maintenance of underwater fiber optic connectors is critical for reliable subsea communications. This guide provides comprehensive procedures and best practices for ensuring optimal connector performance throughout the system lifecycle.
Key success factors include:
– Thorough pre-installation planning
– Adherence to manufacturer procedures
– Rigorous testing and documentation
– Regular preventive maintenance
– Prompt troubleshooting and repair
By following these guidelines, organizations can maximize the reliability and longevity of their underwater fiber optic connector installations while minimizing operational risks and maintenance costs.
References
- IEC 61300 Series – Fibre optic interconnecting devices and passive components
- Telcordia GR-326 – Generic Requirements for Singlemode Optical Connectors
- Navy Underwater Connector Handbook – NAVSEA Technical Manual
- Manufacturer installation guides (SubConn, Ocean Design, TE Connectivity)
- FOA Fiber Optic Technician Training Materials
عدد الكلمات: 4,890 words
Category: Technical Guides
Target Audience: Installation technicians, maintenance engineers, system integrators
SEO Keywords: underwater fiber optic connectors, subsea fiber installation, wet-mate fiber connectors, fiber optic testing, underwater cable maintenance


