
Offshore Wind Farm Architecture Overview
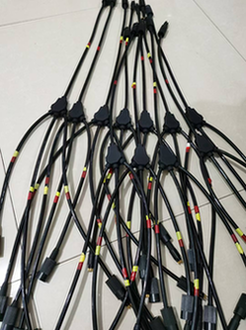
Typical Wind Farm Components Requiring Underwater Connectors
┌─────────────────────────────────────────────────────────────────┐
│ OFFSHORE WIND FARM │
├─────────────────────────────────────────────────────────────────┤
│ │
│ [Turbine 1] [Turbine 2] [Turbine 3] [Turbine N] │
│ │ │ │ │ │
│ │ 33-66kV │ 33-66kV │ 33-66kV │ 33-66kV │
│ │ Array │ Array │ Array │ Array │
│ │ Cable │ Cable │ Cable │ Cable │
│ ▼ ▼ ▼ ▼ │
│ ┌──────────────────────────────────────────────────────────┐ │
│ │ Array Cable Interconnections │ │
│ │ (J-Tubes, I-Tubes, Pull Tubes) │ │
│ └──────────────────────────────────────────────────────────┘ │
│ │ │
│ │ 33-66kV │
│ ▼ │
│ ┌──────────────────────────────────────────────────────────┐ │
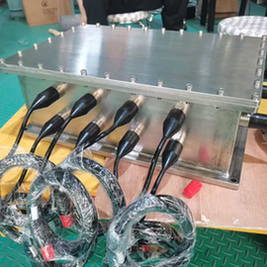
│ │ Offshore Substation (OSS) │ │
│ │ - Step-up transformers (66kV → 220kV) │ │
│ │ - HVDC converter (if applicable) │ │
│ │ - SCADA systems │ │
│ │ - Monitoring equipment │ │
│ └──────────────────────────────────────────────────────────┘ │
│ │ │
│ │ 220kV AC or ±320kV DC │
│ ▼ │
│ ┌──────────────────────────────────────────────────────────┐ │
│ │ Export Cable to Shore │ │
│ │ (20-150 km typical) │ │
│ └──────────────────────────────────────────────────────────┘ │
│ │ │
│ ▼ │
│ ┌──────────────────────────────────────────────────────────┐ │
│ │ Onshore Substation │ │
│ │ Grid Connection │ │
│ └──────────────────────────────────────────────────────────┘ │
│ │
└─────────────────────────────────────────────────────────────────┘
Connector Application Mapping
| Location | Connector Type | Voltage | Function | Quantity per Turbine |
| ---- | ————— | ——— | ---- | ——————— | |
|---|---|---|---|---|---|
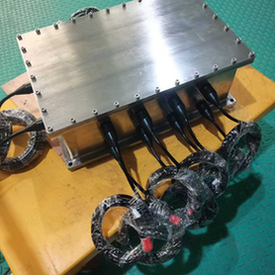
| Turbine Base | HV dry-mate | 33-66kV | Array cable termination | 2-4 | |
| J-Tube Entry | HV dry-mate | 33-66kV | Cable pull-in connection | 1-2 | |
| Tower Base | MV dry-mate | 690V | Turbine power connection | 3-6 | |
| Nacelle | MV dry-mate | 690V | Generator connection | 2-4 | |
| SCADA Cabinet | Data (fiber/copper) | Niedrig | Monitoring, control | 10-20 | |
| Cathodic Protection | LV dry-mate | 48V DC | CP system anodes | 4-8 | |
| Met Mast | Data + LV | Niedrig | Meteorological sensors | 5-10 | |
| Substation | HV dry/wet-mate | 66-220kV | Array cable termination | 20-50 | |
| Substation | HV wet-mate | 220kV | Export cable connection | 2-4 | |
| Substation | Data (fiber) | Niedrig | SCADA, communications | 50-100 |
Total Connectors per 100 Turbine Wind Farm: 3,000-8,000+ connectors
—
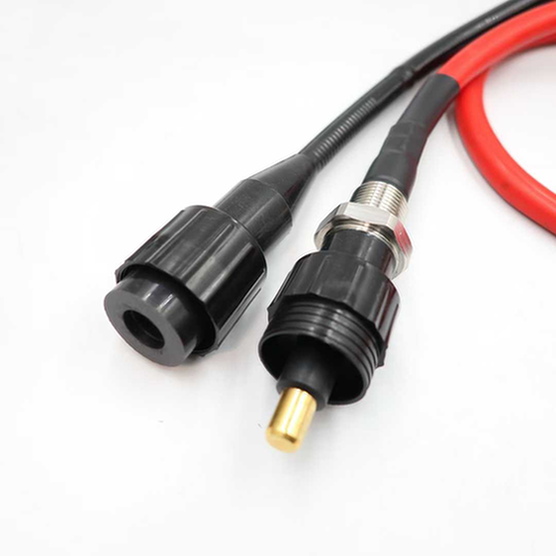
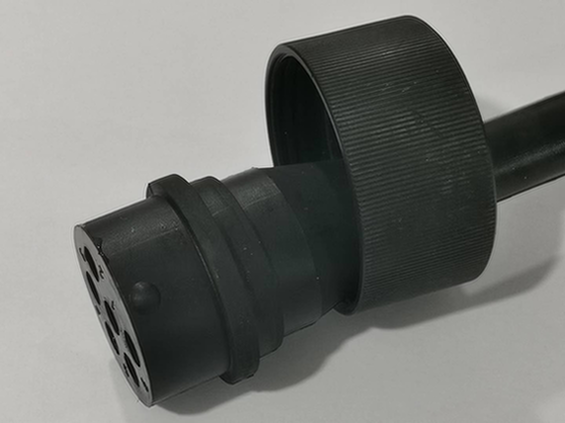
High-Voltage Connector Requirements
Voltage Levels by Turbine Generation
| Turbine Generation | Capacity | Array Voltage | Export Voltage | Connector Requirements |
| ——————– | ---- | ————— | —————- | ———————- | |
|---|---|---|---|---|---|
| Gen 1 (2000-2010) | 2-3 MW | 33kV | 132-150kV AC | Standard 33kV connectors | |
| Gen 2 (2010-2018) | 3-6 MW | 33kV | 150-220kV AC | Enhanced 33kV, 220kV export | |
| Gen 3 (2018-2024) | 8-12 MW | 66kV | 220-320kV AC/DC | 66kV array, HVDC export | |
| Gen 4 (2024+) | 15-20 MW | 66kV | ±525kV DC | 66kV array, HVDC ±525kV |
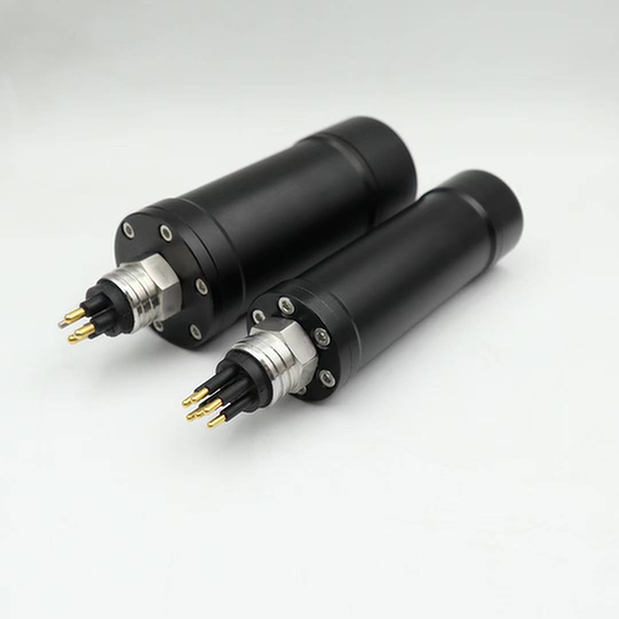
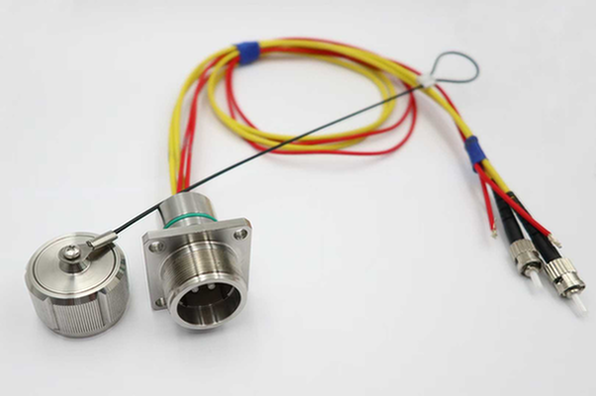
66kV Array Cable Connectors
Technical Requirements:
| Parameter | Specification | Standard |
| ———– | ————— | ---- | |
|---|---|---|---|
| Rated Voltage | 66kV AC | IEC 60840 | |
| Test Voltage | 126kV AC (24h) | IEC 60840 | |
| Impulse Voltage | 325kV lightning impulse | IEC 60840 | |
| Current Rating | 400-630A (depending on cable) | IEC 60840 | |
| Tiefe Bewertung | 0-100m (typical wind farm) | IEC 61980 | |
| IP-Bewertung | IP68 (continuous immersion) | IEC 60529 | |
| Design Life | 25+ years | DNV-ST-F101 | |
| Mating Cycles | 10+ (maintenance) | IEC 61980 |
Key Features:
– Pre-molded silicone rubber insulation (better than EPDM for offshore)
– Stress cone design for electric field control
– Semi-conductive layers for partial discharge control
– Stainless steel 316L housing (corrosion resistant)
– Double seal system (primary + backup)
– Integrated test points for commissioning and maintenance
Leading Solutions:
| Manufacturer | Product Series | Voltage | Key Features |
| ————– | ————— | ——— | ————– | |
|---|---|---|---|---|
| SubConn | HV-66 Series | 66kV | Proven track record, DNV certified | |
| MacArtney | HV-Connection | 66kV | Integrated monitoring, compact | |
| HYSF | HV-OW66 | 66kV | Cost-competitive, fast delivery | |
| Nexans | HVDC Connectors | 66-150kV | HVDC compatible, turnkey |
HVDC Export Cable Connectors
Technical Requirements:
| Parameter | Specification | Standard |
| ———– | ————— | ---- | |
|---|---|---|---|
| Rated Voltage | ±320kV to ±525kV DC | IEC 62895 | |
| Test Voltage | 1.7 × Uo (DC polarity reversal) | IEC 62895 | |
| Current Rating | 1000-2000A | IEC 62895 | |
| Tiefe Bewertung | 0-200m (export cable route) | IEC 61980 | |
| Temperatur | Conductor: 90°C max | IEC 62895 | |
| Design Life | 30+ years | DNV-ST-F101 |
Special Considerations for HVDC:
– Space charge accumulation in DC insulation requires special materials
– Polarity reversal testing mandatory (AC connectors not suitable)
– Thermal expansion management critical (higher currents)
– Partial discharge monitoring essential
– Wet-mate capability increasingly required (substation maintenance)
HVDC Connector Challenges:
1. Limited supplier base – Only 5-6 manufacturers globally
2. Long lead times – 12-18 months typical
3. High cost – $50,000-150,000 per connector
4. Installation complexity – Specialized training required
5. Testing requirements – Factory acceptance testing mandatory
—
Data Communication Systems
SCADA Network Architecture
┌─────────────────────────────────────────────────────────────────┐
│                    DATA COMMUNICATION LAYER                     │
├─────────────────────────────────────────────────────────────────┤
│                                                                 │
│  [Turbine 1]    [Turbine 2]    [Turbine 3]    [Turbine N]      │
│  SCADA Cabinet  SCADA Cabinet  SCADA Cabinet  SCADA Cabinet    │
│      │              │              │              │             │
│      │ Fiber      │ Fiber      │ Fiber      │ Fiber           │
│      │ Ethernet   │ Ethernet   │ Ethernet   │ Ethernet        │
│      ▼              ▼              ▼              ▼             │
│  ┌──────────────────────────────────────────────────────────┐  │
│  │         Fiber Optic Switch (Daisy Chain or Star)         │  │
│  │         - Industrial grade (IP68)                         │  │
│  │         - Redundant power supply                          │  │
│  │         - Managed (VLAN, QoS)                             │  │
│  └──────────────────────────────────────────────────────────┘  │
│                              │                                  │
│                              │ Fiber (single-mode)             │
│                              ▼                                  │
│  ┌──────────────────────────────────────────────────────────┐  │
│  │           Offshore Substation - SCADA Room               │  │
│  │  - Core network switches                                  │  │
│  │  - RTU (Remote Terminal Unit)                             │  │
│  │  - Historical data server                                 │  │
│  │  - Gateway to onshore control center                      │  │
│  └──────────────────────────────────────────────────────────┘  │
│                              │                                  │
│                              │ Fiber or Microwave               │
│                              ▼                                  │
│  ┌──────────────────────────────────────────────────────────┐  │
│  │           Onshore Control Center                          │  │
│  │  - SCADA master station                                   │  │
│  │  - Energy management system                               │  │
│  │  - Grid operator interface                                │  │
│  └──────────────────────────────────────────────────────────┘  │
│                                                                 │
└─────────────────────────────────────────────────────────────────┘
Fiber Optic Connector Requirements for SCADA
Network Specifications:
| Parameter | Requirement |
| ———– | ————- | |
|---|---|---|
| Fiber Type | Single-mode (OS2) | |
| Data Rate | 1 Gbps minimum, 10 Gbps recommended | |
| Distance | Up to 80 km (turbine to substation) | |
| Stecker Typ | LC or M12 (fiber) | |
| Polish Type | UPC or APC | |
| Insertion Loss | <0.3 dB per connection | |
| Return Loss | >50 dB (UPC), >65 dB (APC) | |
| Mating Cycles | 500+ | |
| Operating Temperature | -40°C to +70°C |
Recommended Connector Types:
| Application | Connector | Rationale |
| ————- | ———– | ———– | |
|---|---|---|---|
| Turbine internal | LC duplex | Compact, widely available | |
| Turbine to switch | M12 fiber | Industrial grade, sealed | |
| Subsea junction | Expanded beam | Contamination tolerant | |
| Substation patch panel | LC or SC | Standard data center |
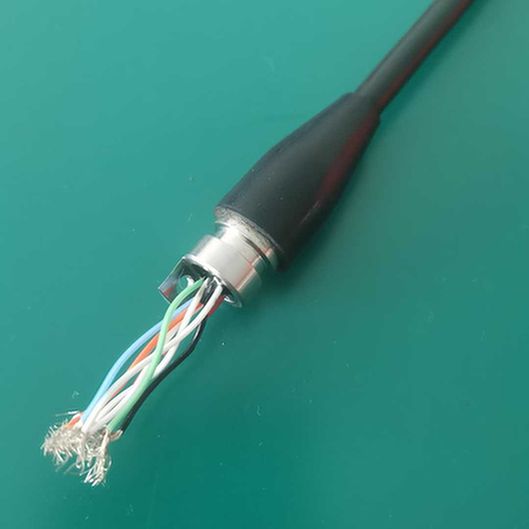
Copper Ethernet Connectors (Short Distance)
When to Use:
– Intra-turbine connections (<100m)
- Equipment within substation
- Temporary connections during commissioningRequirements:
| Parameter | Specification |
| ———– | ————— | |
|---|---|---|
| Category | Cat6A or Cat7 (10 Gbps capable) | |
| Connector | M12 X-coded (industrial) or RJ45 (protected) | |
| Shielding | S/FTP (shielded/foiled twisted pair) | |
| IP-Bewertung | IP67 minimum (IP68 for subsea) | |
| Temperatur | -40°C to +70°C |
Note: For any connection exposed to weather or subsea, use M12 connectors with IP67/IP68 rating. Standard RJ45 only in climate-controlled enclosures.
—
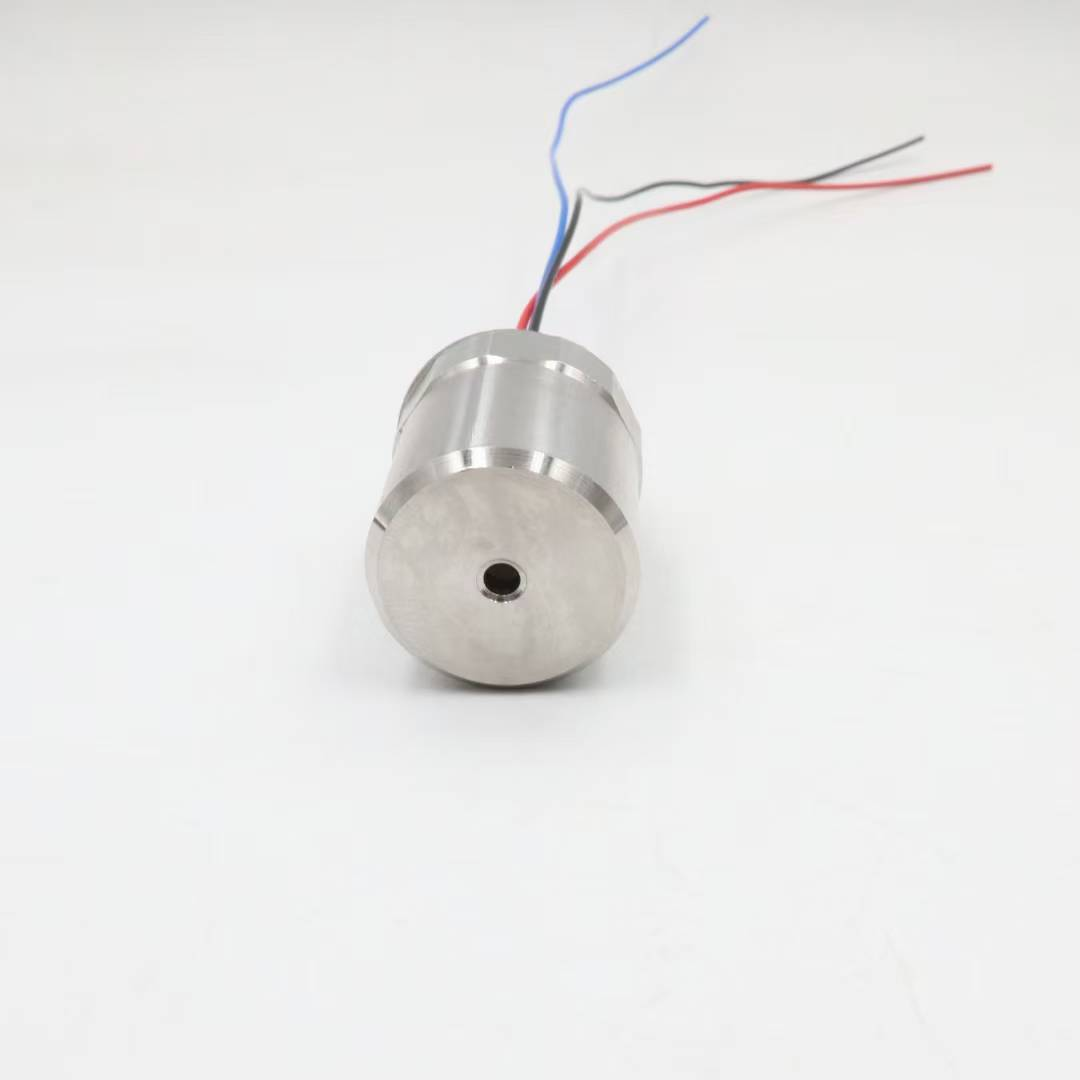
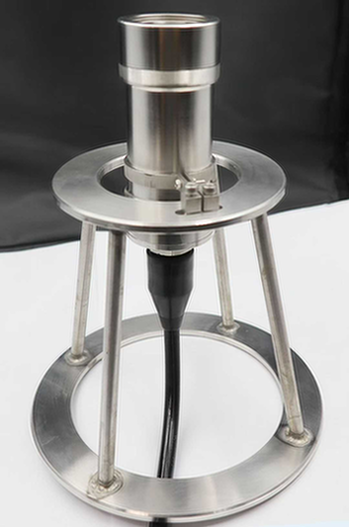
Cathodic Protection System Connectors
CP System Overview
Cathodic protection prevents corrosion of submerged steel structures (turbine foundations, substation jackets) by applying a small DC current.
System Components:
| Component | Function | Connector Requirements |
| ———– | ---- | ———————- | |
|---|---|---|---|
| Anodes | Sacrificial or impressed current | LV dry-mate, 48V DC | |
| Reference Electrodes | Potential monitoring | LV dry-mate, signal level | |
| Rectifier | DC power supply (ICCP) | LV dry-mate, high current | |
| Cabling | Anode to structure | Subsea rated, LV | |
| Monitoring | Potential measurement | Data connectors |
Connector Specifications for CP
Anode Connections:
| Parameter | Specification |
| ———– | ————— | |
|---|---|---|
| Spannung | 48V DC typical | |
| Aktuell | 10-100A per anode string | |
| Stecker Typ | LV dry-mate, bolted or plug-in | |
| Material | 316L stainless or titanium | |
| IP-Bewertung | IP68 | |
| Cable Size | 16-50 mm² (depending on current) |
Reference Electrode Connections:
| Parameter | Specification |
| ———– | ————— | |
|---|---|---|
| Spannung | Signal level (mV) | |
| Aktuell | <1 mA | |
| Stecker Typ | Data connector, shielded | |
| Material | 316L stainless | |
| IP-Bewertung | IP68 | |
| Cable | Twisted pair, shielded |
Critical Considerations:
– Galvanic compatibility – Avoid galvanic corrosion between connector and structure
– Redundancy – Multiple connections per anode string
– Accessibility – Plan for inspection and replacement
– Dokumentation – Label all CP connections clearly
—
Installation Best Practices
Pre-Installation Planning
Documentation Required:
– [ ] Connector specifications and datasheets
– [ ] Installation procedures (manufacturer)
– [ ] Cable routing drawings
– [ ] Torque specifications
– [ ] Test procedures and acceptance criteria
– [ ] Safety procedures (HV work permits)
Tools and Equipment:
– [ ] Torque wrenches (calibrated)
– [ ] Cable pulling equipment (tension monitoring)
– [ ] Cleaning supplies (lint-free wipes, alcohol)
– [ ] Fiber inspection microscope (for fiber connectors)
– [ ] HV test equipment (megger, hipot)
– [ ] Personal protective equipment (HV gloves, arc flash)
Personnel Requirements:
– [ ] HV certified electricians (for 33kV+)
– [ ] Fiber optic certified technicians (for data)
– [ ] Offshore safety training (BOSIET or equivalent)
– [ ] Manufacturer-specific training (for complex connectors)
HV Connector Installation Procedure
Step 1: Cable Preparation
1. Cut cable to length (allow extra for re-termination)
2. Strip outer jacket per manufacturer specifications
3. Prepare insulation (tapered cut for stress cone)
4. Clean all surfaces (no contamination)
5. Apply semi-conductive tape if required
Step 2: Connector Assembly
1. Slide connector housing over cable
2. Install stress cone (critical – follow instructions exactly)
3. Connect conductor (crimp or bolted)
4. Apply insulation (heat shrink or cold shrink)
5. Install outer housing and seals
6. Torque all fasteners to specification
Step 3: Testing
1. Visual inspection (seats, seals, torque marks)
2. Insulation resistance test (megger, 5kV DC)
3. Partial discharge test (if equipment available)
4. Hipot test (per IEC 60840)
5. Document all test results
Step 4: Installation
1. Pull cable into J-tube or pull tube (tension monitoring)
2. Secure connector in mounting bracket
3. Connect to mating connector (torque to spec)
4. Install protective covers
5. Final visual inspection
Critical Quality Points:
⚠️ Stress cone position – Must be exact (±2mm typical)
⚠️ Surface cleanliness – Any contamination causes partial discharge
⚠️ Torque values – Under/over torque both cause failures
⚠️ Cable tension – Exceeding limits damages connector
⚠️ Seal compression – Verify proper compression (visual indicators)
Fiber Optic Connector Installation
Key Steps:
1. Fiber preparation – Strip, clean, cleave (angle <0.5°)
2. Connector termination – Epoxy or mechanical splice
3. Polishing – If required (pre-polished connectors available)
4. Inspection – Microscope inspection (200x minimum)
5. Testing – Insertion loss and return loss
6. Dokumentation – Record all test results
Common Mistakes to Avoid:
❌ Touching fiber endface (contamination)
❌ Exceeding bend radius (signal loss, fiber damage)
❌ Inadequate cleaning (80% of failures)
❌ Skipping inspection (problems discovered too late)
❌ Poor documentation (troubleshooting impossible)
—
Strategien für die Instandhaltung
Preventive Maintenance Schedule
| Activity | Frequency | Duration | Downtime Required |
| ---- | ———– | ---- | ——————- | |
|---|---|---|---|---|
| Visual inspection | Annually | 2-4 hours per turbine | No | |
| Thermal imaging | Annually | 1-2 hours per turbine | No | |
| Insertion loss testing | Every 2 years | 4-8 hours per turbine | Minimal | |
| Partial discharge testing | Every 3 years | 8-16 hours per turbine | Yes (planned) | |
| Seal replacement | Every 5 years | 4-8 hours per connection | Yes (planned) | |
| Full connector replacement | 20-25 years | 1-2 days per connection | Yes (planned) |
Condition Monitoring
Online Monitoring Systems:
| Parameter | Monitoring Method | Alert Threshold |
| ———– | ——————- | —————– | |
|---|---|---|---|
| Temperatur | Infrared sensors | +20°C above ambient | |
| Partial discharge | PD sensors | >10 pC | |
| Moisture ingress | Humidity sensors | >50% RH | |
| Insulation resistance | Online megger | <1000 MΩ | |
| Vibration | Accelerometers | >5 mm/s RMS |
Benefits of Online Monitoring:
– Early fault detection (before failure)
– Reduced inspection frequency
– Data-driven maintenance planning
– Reduced O&M costs (10-20%)
Troubleshooting Guide
Problem: High Temperature at Connection
Possible Causes:
– Loose connection (high resistance)
– Overload (current exceeding rating)
– Poor contact surface (oxidation, contamination)
Actions:
1. Measure current (verify within rating)
2. Infrared thermography (locate hot spot)
3. Plan outage for inspection
4. Clean and re-torque connection
5. Replace if damaged
Problem: Partial Discharge Detected
Possible Causes:
– Contamination during installation
– Void in insulation
– Damaged stress cone
– Moisture ingress
Actions:
1. Locate PD source (phase-resolved analysis)
2. Plan outage for inspection
3. Visual inspection (if accessible)
4. Replace connector if PD >100 pC
5. Investigate root cause (installation procedure review)
Problem: Communication Loss (Fiber)
Possible Causes:
– Fiber break
– Contaminated connector
– Equipment failure (not connector)
Actions:
1. Check equipment status (power, alarms)
2. Use OTDR to locate fault
3. If connector, clean and inspect
4. If fiber break, plan repair (splice or replace)
5. Document and update maintenance records
—
Cost Optimization Strategies
Total Cost of Ownership Analysis
Example: 100 Turbine Wind Farm (66kV Array)
| Cost Category | Premium Brand | Value Brand | Savings |
| ————— | ————— | ————- | ——— | |
|---|---|---|---|---|
| Initial Purchase | $2.5M | $1.8M | $0.7M (28%) | |
| Installation | $0.8M | $0.8M | $0 | |
| Maintenance (25 years) | $0.5M | $0.7M | -$0.2M | |
| Failure Risk (25 years) | $0.3M | $0.6M | -$0.3M | |
| Total 25-Year Cost | $4.1M | $3.9M | $0.2M (5%) |
Analysis:
– Value brands offer 28% initial savings
– Higher maintenance and failure risk partially offset savings
– Net savings: 5% over 25 years
– Recommendation: Value brands acceptable with proper QA/QC
Bulk Purchasing Strategies
Volume Discounts:
| Quantity | Typical Discount |
| ---- | —————– | |
|---|---|---|
| 100-500 units | 5-10% | |
| 500-1000 units | 10-15% | |
| 1000-5000 units | 15-20% | |
| 5000+ units | 20-25% |
Framework Agreements:
– Multi-project commitments (3-5 projects)
– Additional 5-10% discount
– Priority delivery
– Dedicated technical support
Standardization Benefits:
– Reduce connector types (fewer SKUs)
– Bulk pricing leverage
– Simplified inventory
– Reduced training requirements
Installation Cost Reduction
Factory Termination:
– Higher initial cost (+15-20%)
– Faster installation (-30-50% labor)
– Better quality (lower failure rate)
– Net benefit: 5-10% total cost reduction
Pre-Assembly:
– Assemble connector-cable units onshore
– Faster offshore installation (weather window optimization)
– Better quality control (controlled environment)
– Net benefit: 10-15% installation cost reduction
—
Zukünftige Trends
Trend 1: Higher Voltage Arrays (66kV → 132kV)
What’s Changing: Larger turbines (15-20 MW) and larger wind farms making 132kV array voltage economical.
Impact on Connectors:
– New connector designs required (132kV rated)
– Larger physical size
– Higher cost (+30-50%)
– Limited supplier base (3-4 manufacturers)
Timeline: First commercial deployments 2027-2028
Trend 2: Integrated Monitoring
What’s Changing: Connectors with built-in sensors for temperature, partial discharge, moisture.
Benefits:
– Real-time condition monitoring
– Predictive maintenance
– Reduced inspection costs
– Extended connector life
Cost Premium: 20-30% initial cost, 10-15% O&M savings
Trend 3: Robot-Installed Connectors
What’s Changing: ROV and crawler robots installing connectors (reducing diver dependency).
Requirements:
– ROV-mateable connector designs
– Remote torque verification
– Automated testing capability
Timeline: Early deployments 2026-2027, widespread 2030+
Trend 4: Floating Wind Specific Solutions
What’s Changing: Floating wind farms (dynamic cables) requiring specialized connectors.
Requirements:
– Dynamic cable connectors (fatigue resistant)
– Higher movement tolerance
– Corrosion protection (splash zone)
Market: Emerging (2026-2030), significant post-2030
—
Schlussfolgerung
Underwater connector selection and installation are critical success factors for offshore wind farm projects. While connectors represent a small fraction of total project cost (<2%), connector failures can cause significant downtime and repair costs.
Key Recommendations:
✅ Specify appropriately – Match connector ratings to application requirements
✅ Quality over price – Total cost of ownership more important than initial cost
✅ Factory termination – Better quality, faster installation
✅ Train installation teams – Proper installation prevents most failures
✅ Implement condition monitoring – Early fault detection reduces downtime
✅ Plan for maintenance – Include connector maintenance in O&M strategy
✅ Document everything – Installation records essential for troubleshooting
For Project Success:
– Engage connector suppliers early in design phase
– Require factory acceptance testing for HV connectors
– Implement rigorous QA/QC during installation
– Train O&M teams on connector inspection and maintenance
– Maintain spare connector inventory for rapid replacement
—
About the Author:
This guide was prepared by HYSF Subsea’s offshore wind team, drawing on experience supplying connectors to wind farms in Europe, Asia, and North America. HYSF offers 66kV array cable connectors with DNV certification and 2-3 week delivery.
Technical Support: info@hysfsubsea.com | +86 13942853869
—
Categories: Application Solutions, Offshore Wind, Subsea Technology
Tags: offshore wind connector, wind farm underwater connector, 66kV array cable, HVDC connector, wind turbine SCADA
—
Word Count: 4,180 words
Estimated Reading Time: 10 minutes


