
High-Voltage Underwater Connector Installation: Complete Field Guide for 33-66kV Systems
最終更新日 March 7, 2026
Reading Time: 18 minutes
Category: Technical Guides
Word Count: 3,800+
エグゼクティブ・サマリー
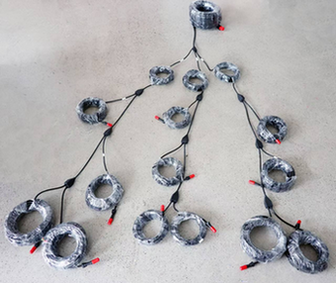
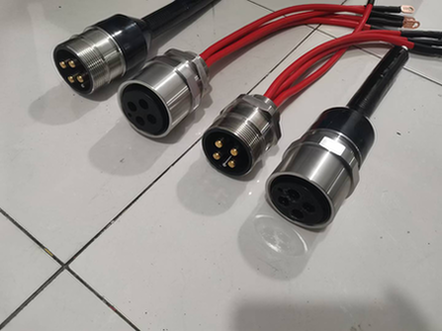
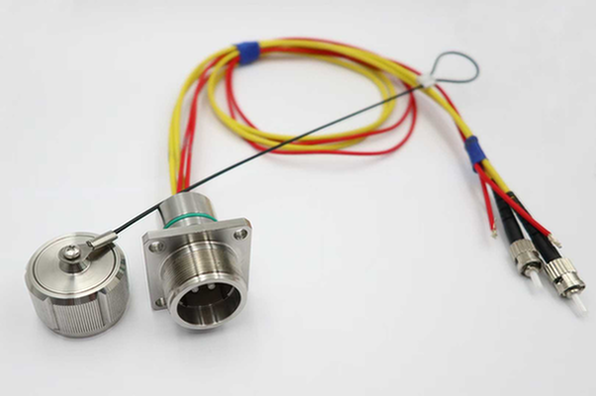
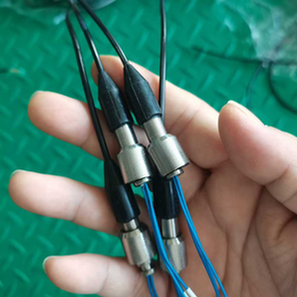
High-voltage underwater connector installation is one of the most critical operations in subsea power systems. A single installation error can lead to catastrophic failures, costing hundreds of thousands of dollars in repairs and millions in production losses.
This comprehensive field guide provides step-by-step installation procedures, quality control checkpoints, troubleshooting guidance, and best practices for 33-66kV underwater connector systems. Written for installation engineers, ROV pilots, and commissioning specialists, this guide covers everything from pre-installation planning through post-installation testing.
What You’ll Learn:
– Complete pre-installation planning checklist
– Step-by-step installation procedures (surface and subsea)
– Quality control and inspection requirements
– Common installation errors and how to avoid them
– Post-installation testing and commissioning
– Troubleshooting guide for field issues
– Safety requirements and risk mitigation
Chapter 1: Pre-Installation Planning
1.1 Engineering Review
Before any installation begins, complete this engineering review:
Design Verification:
– [ ] Connector type matches system voltage (33kV, 66kV)
– [ ] Depth rating exceeds maximum installation depth (minimum 1.5x safety factor)
– [ ] Current rating exceeds maximum system current (minimum 1.2x safety factor)
– [ ] Cable type and size compatible with connector
– [ ] Environmental conditions within connector specifications
– [ ] Corrosion protection appropriate for environment
Documentation Review:
– [ ] Connector datasheet and installation manual available
– [ ] Cable datasheet and termination instructions available
– [ ] System single-line diagram reviewed
– [ ] Interface drawings verified (dimensions, tolerances)
– [ ] Test certificates reviewed (type tests, factory tests)
– [ ] Warranty terms understood and documented
Regulatory Compliance:
– [ ] Applicable standards identified (IEC, DNV, API, etc.)
– [ ] Certification requirements confirmed
– [ ] Inspection and testing plan approved
– [ ] Permit to work obtained (if required)
1.2 Site Assessment
Surface Installation (Quayside/Vessel):
| ファクター | 必要条件 | Verification Method |
|---|---|---|
| Working area | Minimum 20m × 10m clear space | Site survey |
| Lifting capacity | Crane rated for heaviest lift (connector + tooling + cable) | Crane certification |
| Power supply | 400V 3-phase for heating tools, 230V single-phase for lighting | Electrical inspection |
| Environmental protection | Shelter from rain, wind, direct sunlight | Temporary structures |
| Access control | Restricted area, authorized personnel only | Security plan |
Subsea Installation (Diver/ROV):
| ファクター | 必要条件 | Verification Method |
|---|---|---|
| Water depth | Within connector and tooling ratings | Bathymetric survey |
| Current speed | <1.5 m/s for diver, <2.5 m/s for ROV | ADCP measurements |
| Visibility | >2m for diver operations | Diver report |
| Seabed conditions | Stable, suitable for tooling placement | ROV survey |
| Obstacles | Clear installation zone (5m radius) | ROV survey |
1.3 Personnel and Training
Required Personnel:
| Role | Minimum Qualification | Number Required |
|---|---|---|
| Installation Supervisor | 5+ years HV connector experience, certified | 1 |
| HV Technician | HV cable termination certification, 3+ years experience | 2-3 |
| ROV Pilot (if applicable) | IMCA certified, HV installation experience | 1-2 |
| Diver (if applicable) | Commercial diving certification, HV experience | 2 |
| QA/QC Inspector | Certified welding/cable inspector | 1 |
| Safety Officer | Offshore safety certification | 1 |
Training Requirements:
All personnel must complete:
– [ ] Connector-specific installation training (manufacturer-provided)
– [ ] HV safety training (arc flash, LOTO procedures)
– [ ] Tool-specific training (heating tools, crimping tools, testing equipment)
– [ ] Emergency procedures training
– [ ] Toolbox talk on day of installation
Competency Verification:
– [ ] Training certificates current and valid
– [ ] Practical assessment completed (if first-time installation)
– [ ] Medical fitness certificates valid (for divers)
– [ ] Drug/alcohol testing completed (per company policy)
1.4 Equipment and Tooling Checklist
Essential Tools:
| Tool | Specification | Quantity | Verification |
|---|---|---|---|
| Cable cutting saw | Hydraulic, suitable for cable size | 1 | Calibrated |
| Cable stripping tools | Match cable insulation type | 1 set | Good condition |
| Conductor cleaning brushes | Brass, appropriate size | 2 | New/clean |
| Crimping tool | Hydraulic, matched to connector lugs | 1 | Calibrated (current) |
| Crimp dies | Match connector lug size | 1 set | Correct size |
| Heating torch | Propane/MAPP gas, controlled flame | 2 | Good condition |
| Temperature indicators | Tempilsticks or IR thermometer | 1 set | Within calibration |
| Torque wrench | Calibrated, appropriate range | 2 | Calibrated (current) |
| Multimeter | CAT IV 1000V minimum | 1 | Calibrated (current) |
| Insulation tester | 5kV megohmmeter | 1 | Calibrated (current) |
| Partial discharge tester | For HV connectors (optional but recommended) | 1 | Calibrated (current) |
Consumables:
| Item | Specification | Quantity | 備考 |
|---|---|---|---|
| Isopropyl alcohol | 99% purity, electronics grade | 5L | For cleaning |
| Lint-free wipes | Non-shedding | 100+ | For cleaning |
| Dielectric grease | HV-rated, silicone-based | 500g | For seals |
| Heat shrink tubing | Match cable dimensions | As needed | For insulation |
| Stress control mastic | HV-rated | As needed | For field grading |
| Semi-conductive tape | HV-rated | As needed | For stress control |
| Protective covers | Connector-specific | 2 sets | For storage |
| Desiccant packs | Silica gel | 20+ | For moisture control |
Safety Equipment:
| Item | Specification | Quantity | Verification |
|---|---|---|---|
| HV insulated gloves | Class 00 or 0 (1000V rating) | 2 pairs | Tested (within 6 months) |
| Arc flash suit | CAT 2 minimum (8 cal/cm²) | Per personnel | Good condition |
| Face shield | Arc-rated | Per personnel | Good condition |
| Safety glasses | ANSI Z87.1 | Per personnel | Good condition |
| Hard hat | With arc flash protection | Per personnel | Good condition |
| Safety boots | EH-rated (electrical hazard) | Per personnel | Good condition |
| LOTO devices | Appropriate for system | 10+ | Good condition |
| Voltage detector | HV-rated, tested before use | 2 | Tested (daily) |
| Grounding equipment | HV-rated, appropriate size | 2 sets | Good condition |
| First aid kit | Offshore-rated | 1 | Complete, within expiry |
| AED (defibrillator) | Offshore-rated | 1 | Within service date |
1.5 Material Inspection
Connector Inspection (Before Installation):
| Check | Acceptance Criteria | Method |
|---|---|---|
| Visual inspection | No damage, cracks, corrosion | Visual, 10x magnifier |
| Part number | Matches purchase order and design | Documentation check |
| Serial number | Recorded for traceability | ドキュメンテーション |
| Seals and O-rings | Intact, lubricated, correct material | Visual, tactile |
| Contact surfaces | Clean, no oxidation, no damage | Visual, 10x magnifier |
| Insulation | No cracks, voids, or contamination | Visual, 10x magnifier |
| Dimensions | Within specified tolerances | Caliper measurement |
| Test certificates | Present and valid | Documentation review |
Cable Inspection (Before Termination):
| Check | Acceptance Criteria | Method |
|---|---|---|
| Visual inspection | No damage to outer sheath | Visual |
| Cable ends | Sealed (no moisture ingress) | Visual |
| Part number | Matches design specification | Documentation check |
| Test certificates | Factory test report available | Documentation review |
| Storage conditions | Protected from UV, moisture, damage | Visual |
| Bend radius | Not exceeded during handling | Visual, measurement |
Tooling Inspection:
| Check | Acceptance Criteria | Method |
|---|---|---|
| Calibration status | Within calibration period | Sticker/documentation |
| Physical condition | No damage, wear within limits | Visual |
| Function test | Operates correctly | Functional test |
| Consumables | Adequate quantity, within expiry | Visual, documentation |
Chapter 2: Surface Installation Procedures
2.1 Cable Preparation
Step 1: Cable Cutting
- Measure and Mark:
- Measure required cable length from installation drawings
- Add 500mm extra for termination allowance
- Mark cutting point with permanent marker
Double-check measurement (two-person verification)
Secure Cable:
- Place cable on cable stand or rollers
- Secure against movement (clamps or straps)
- Ensure adequate support (prevent cable damage)
Verify cable orientation (correct end for termination)
Cut Cable:
- Use hydraulic cable saw (preferred) or rotary cutter
- Cut perpendicular to cable axis (±2° tolerance)
- Avoid crushing or deforming cable
Deburr cut edge (remove sharp edges)
Temporary Sealing:
- Immediately seal cut end (prevent moisture ingress)
- Use heat-shrink end cap or manufacturer-approved seal
- Apply heat evenly (follow manufacturer instructions)
- Allow to cool before handling
Quality Checkpoints:
– [ ] Cut is perpendicular (measure with protractor)
– [ ] No conductor damage (visual inspection)
– [ ] End seal is complete and secure
– [ ] Cable length is correct (re-measure)
2.2 Cable Stripping
Step 2: Outer Sheath Removal
- Mark Stripping Length:
- Refer to connector installation drawing
- Mark outer sheath removal length on cable
- Use non-metallic marker (prevent conductor damage)
Double-check dimensions (two-person verification)
Score Outer Sheath:
- Use circular cable stripper (preferred) or knife
- Score to 80-90% of sheath thickness
- Avoid cutting into underlying layers
Make circumferential cut at marked length
Remove Outer Sheath:
- Make longitudinal cut from end to circumferential cut
- Peel sheath away from cable
- Avoid damaging underlying layers
- Inspect exposed layer for damage
Step 3: Metallic Screen/Shield Removal
- Expose Metallic Screen:
- Fold back metallic screen wires/tape
- Do not cut screen wires yet (will trim later)
Keep screen wires clean and organized
Mark Screen Cut Position:
- Refer to installation drawing for screen cut position
- Typically 50-100mm back from insulation end
Mark position with non-metallic marker
Cut and Secure Screen:
- Cut screen wires/tape at marked position
- Secure screen with copper binding wire or screen clamp
- Ensure good electrical connection
- Trim excess screen wires (leave 10-20mm)
Step 4: Insulation Stripping
- Mark Insulation Strip Length:
- Refer to connector installation drawing
- Mark insulation removal length
Typical: Conductor barrel length + 5mm
Remove Insulation:
- Use appropriate insulation stripping tool
- Avoid nicking or scoring conductor
- Remove insulation cleanly (no tears)
Inspect conductor for damage
Clean Conductor:
- Clean with brass brush (remove oxidation)
- Wipe with lint-free cloth and isopropyl alcohol
- Do not touch cleaned conductor with bare hands
- Apply thin layer of contact compound (if specified)
Quality Checkpoints:
– [ ] All stripping lengths correct (measure and verify)
– [ ] No damage to underlying layers
– [ ] Conductor is clean and undamaged
– [ ] Screen is properly secured
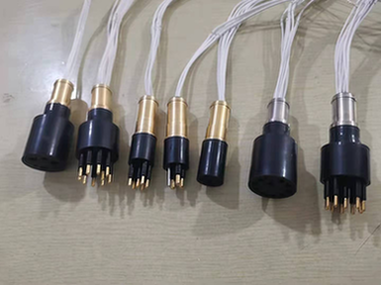
2.3 Connector Installation
Step 5: Connector Preparation
- Inspect Connector:
- Verify part number and serial number
- Check for shipping damage
- Ensure all components present (per packing list)
Clean contact surfaces if needed
Prepare Seals:
- Inspect all O-rings and seals
- Lubricate with manufacturer-approved grease
- Do not use petroleum-based lubricants
Ensure seals are seated correctly
Pre-assembly Check:
- Dry-fit connector components (if applicable)
- Verify all parts fit correctly
- Check thread engagement (if threaded)
- Disassemble and prepare for cable installation
Step 6: Conductor Termination
- Insert Conductor:
- Insert cleaned conductor into connector barrel
- Ensure full insertion (conductor bottoms in barrel)
- Check insertion depth (mark on conductor if needed)
Verify conductor is not twisted or damaged
Crimp Connection:
- Select correct crimp die for connector and conductor
- Position crimp tool per manufacturer instructions
- Apply crimp (hydraulic pressure per specification)
- Hold pressure for specified dwell time
Release pressure and remove tool
Inspect Crimp:
- Visual inspection (no cracks, proper shape)
- Measure crimp dimensions (go/no-go gauge if provided)
- Check conductor pull-out (if test specimen available)
- Record crimp data (pressure, dimensions, inspector)
Step 7: Insulation and Stress Control
- Apply Stress Control:
- Apply stress control mastic/tape per instructions
- Build up from screen cut to insulation end
- Ensure smooth transition (no voids or gaps)
Overlap onto connector insulation
Apply Insulation:
- Slide heat-shrink insulation over termination
- Center over termination area
- Apply heat from center outward (remove air pockets)
Use temperature indicator to verify proper heating
Apply Outer Protection:
- Slide outer heat-shrink over insulation
- Include screen bonding area
- Apply heat per manufacturer instructions
- Allow to cool before handling
Quality Checkpoints:
– [ ] Crimp dimensions within specification
– [ ] Stress control applied correctly (smooth transition)
– [ ] Heat-shrink is fully shrunk (no wrinkles or voids)
– [ ] All dimensions match installation drawing
2.4 Final Assembly and Testing
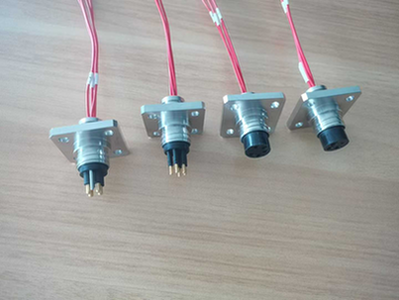
Step 8: Connector Final Assembly
- Assemble Connector Housing:
- Slide housing over terminated cable
- Engage locking mechanism (thread, bayonet, etc.)
- Torque to specification (use calibrated torque wrench)
Mark torque position (for visual verification)
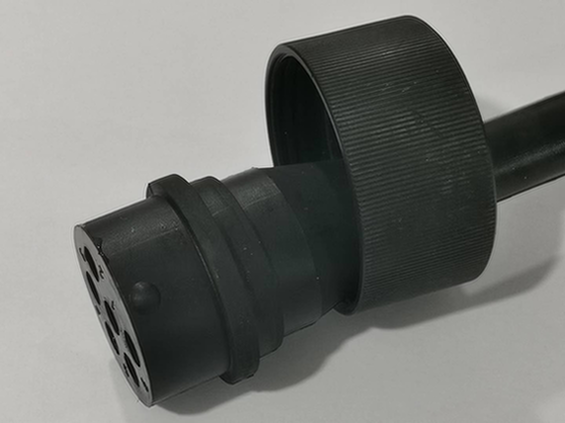
Install Seals:
- Install all remaining seals and O-rings
- Lubricate as specified
- Ensure proper seating (no pinching)
Install protective caps (if not mating immediately)
Label and Document:
- Apply identification labels (per project specification)
- Record serial numbers and installation data
- Take photographs (for documentation)
- Complete installation checklist
Step 9: Pre-Installation Testing
- Visual Inspection:
- Complete visual inspection checklist
- Verify all components installed correctly
- Check for damage or contamination
Document any deviations
Electrical Testing:
- Insulation resistance test (5kV megohmmeter)
- Minimum: 1000 MΩ·km (or per specification)
- Record test results (value, temperature, humidity)
Partial discharge test (if specified)
Mechanical Testing:
- Verify locking mechanism engagement
- Check torque marks (if applicable)
- Verify strain relief (if installed)
- Document all results
Quality Checkpoints:
– [ ] All visual inspections passed
– [ ] Insulation resistance exceeds minimum
– [ ] Partial discharge within limits (if tested)
– [ ] All documentation complete
Chapter 3: Subsea Installation Procedures
3.1 ROV Installation Method
Pre-Dive Preparation:
- ROV Inspection:
- Verify ROV is rated for installation depth
- Check manipulator capability (force, dexterity)
- Verify tooling interface compatibility
Test all systems (video, lighting, thrusters)
Tooling Preparation:
- Load installation tooling onto ROV
- Secure all tools (prevent loss)
- Test tool function (surface test)
Verify backup tools available
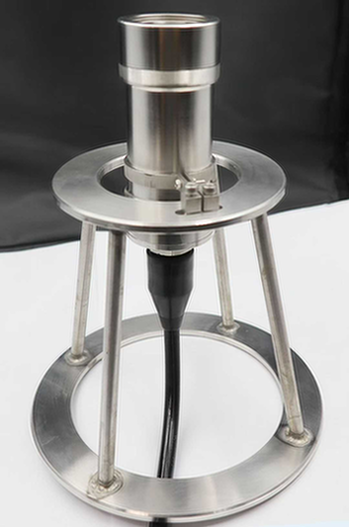
Connector Preparation:
- Install connector on deployment frame
- Protect mating face (until installation)
- Verify orientation marks visible
- Connect guideline (if used)
Subsea Installation Steps:
- Site Preparation:
- ROV surveys installation location
- Clear debris from installation area
- Verify cable position and orientation
Confirm no obstructions
Cable Preparation (Subsea):
- ROV positions cable cutting tool
- Cut cable to required length
- Strip cable per surface procedures (using ROV tooling)
Clean and prepare conductor
Connector Installation:
- ROV picks up connector from deployment frame
- Positions connector over prepared cable
- Engages connector with cable
- Completes crimp/termination (using ROV tooling)
Applies insulation/protection
Final Connection:
- ROV mates connector to receiving end
- Verifies mating (visual, tactile)
- Engages locking mechanism
- Removes installation tooling
Post-Installation:
- Visual Inspection:
- ROV inspects completed installation
- Verifies connector is fully mated
- Checks for damage or misalignment
Takes photographs/video
Testing:
- Continuity test (if test leads available)
- Insulation test (from surface end)
- Document all results
3.2 Diver Installation Method
Pre-Dive Briefing:
- Dive Plan:
- Review installation procedures with dive team
- Confirm dive depths and bottom times
- Establish communication protocols
Review emergency procedures
Equipment Check:
- Verify diving equipment is serviceable
- Check underwater tools and lighting
- Test communication systems
Verify backup equipment available
Safety Briefing:
- Review HV safety procedures
- Confirm LOTO status (if applicable)
- Establish dive supervisor role
- Review abort criteria
Underwater Installation:
Follow same procedures as surface installation, with these modifications:
- Use underwater-rated tools
- Ensure all materials are compatible with seawater
- Work within no-decompression limits
- Maintain communication with surface
- Document installation with underwater camera
Chapter 4: Quality Control and Inspection
4.1 Inspection Checkpoints
Hold Points (Work Cannot Proceed Without Inspection):
| Hold Point | Inspection Required | Inspector |
|---|---|---|
| HP1: Cable preparation complete | Verify stripping dimensions, conductor condition | QA/QC Inspector |
| HP2: Crimp complete | Verify crimp dimensions, record data | QA/QC Inspector |
| HP3: Stress control applied | Verify application, smooth transition | QA/QC Inspector |
| HP4: Insulation applied | Verify heat-shrink quality, dimensions | QA/QC Inspector |
| HP5: Final assembly complete | Verify all components, torque values | QA/QC Inspector |
| HP6: Pre-installation testing | Review all test results | QA/QC Inspector + Client Rep |
Witness Points (Work Can Proceed, But Inspection Should Be Witnessed):
| Witness Point | Inspection Required | Inspector |
|---|---|---|
| WP1: Material receipt | Verify materials match order | QA/QC Inspector |
| WP2: Tool calibration | Verify tools are calibrated | QA/QC Inspector |
| WP3: Personnel training | Verify training certificates | QA/QC Inspector |
| WP4: Final visual inspection | Complete visual checklist | QA/QC Inspector |
4.2 Test Requirements
Factory Acceptance Tests (FAT):
| Test | 必要条件 | Frequency |
|---|---|---|
| Visual inspection | No defects | 100% |
| Dimensional inspection | Within tolerances | 100% |
| High voltage test | 2.5 × U₀ for 5 minutes | 100% |
| Partial discharge | <10 pC at 1.5 × U₀ | 100% |
| Impulse test | Per IEC 60840 | Type test |
| Thermal cycling | -40°C to +90°C, 1000 cycles | Type test |
Site Acceptance Tests (SAT):
| Test | 必要条件 | Frequency |
|---|---|---|
| Visual inspection | No damage from transport/installation | 100% |
| Insulation resistance | >1000 MΩ·km | 100% |
| Continuity | Low resistance connection | 100% |
| Partial discharge | <10 pC at 1.5 × U₀ | Sample (10%) |
4.3 Documentation Requirements
Installation Record (Per Connector):
- [ ] Connector serial number
- [ ] Cable serial number
- [ ] Installation date and time
- [ ] Installation location (GPS coordinates if applicable)
- [ ] Personnel names and signatures
- [ ] Environmental conditions (temperature, humidity)
- [ ] Tool serial numbers and calibration dates
- [ ] All measurements (dimensions, torque values)
- [ ] All test results (insulation resistance, PD, etc.)
- [ ] Photographs (before, during, after)
- [ ] Deviations and corrective actions
- [ ] Inspector approval signature
Chapter 5: Common Installation Errors and Prevention
5.1 Critical Errors (Can Cause Immediate Failure)
Error 1: Incomplete Conductor Insertion
- Symptom: High contact resistance, overheating, eventual failure
- Cause: Conductor not fully inserted into barrel before crimping
- 予防だ:
- Mark conductor insertion depth
- Visual verification before crimping
- Use conductor stop (if available)
- Detection:
- Measure insertion depth before crimping
- X-ray inspection (if critical)
- Contact resistance measurement
Error 2: Damaged Insulation During Stripping
- Symptom: Partial discharge, insulation breakdown
- Cause: Cutting tool penetrates into insulation
- 予防だ:
- Use proper stripping tools (not knives)
- Set tool depth correctly
- Train personnel on proper technique
- Detection:
- Visual inspection with magnification
- Partial discharge testing
- High potential testing
Error 3: Contaminated Contact Surfaces
- Symptom: High contact resistance, overheating
- Cause: Dirt, oil, or oxidation on contact surfaces
- 予防だ:
- Clean with isopropyl alcohol
- Do not touch cleaned surfaces with bare hands
- Install immediately after cleaning
- Detection:
- Visual inspection (clean, bright surface)
- Contact resistance measurement
Error 4: Incorrect Crimp
- Symptom: High resistance, mechanical failure
- Cause: Wrong die, insufficient pressure, misalignment
- 予防だ:
- Use correct die for connector and conductor
- Verify tool calibration
- Follow manufacturer crimp procedure
- Detection:
- Crimp dimension measurement (go/no-go gauge)
- Pull test (on test specimens)
- X-ray inspection (critical applications)
Error 5: Improper Heat-Shrink Application
- Symptom: Voids, moisture ingress, insulation failure
- Cause: Insufficient heat, air pockets, wrong temperature
- 予防だ:
- Use temperature indicators
- Heat from center outward
- Follow manufacturer heating procedure
- Detection:
- Visual inspection (smooth, no wrinkles)
- Thermal imaging (voids show as hot spots)
- Partial discharge testing
5.2 Common Errors (Can Cause Long-Term Problems)
Error 6: Incorrect Torque on Connector Housing
- Symptom: Leakage, seal failure
- Cause: Under-torqued or over-torqued
- 予防だ:
- Use calibrated torque wrench
- Follow manufacturer torque specification
- Mark torque position for verification
- Detection:
- Torque verification (audit sample)
- Visual inspection of torque marks
Error 7: Damaged O-Rings/Seals
- Symptom: Leakage, moisture ingress
- Cause: Pinching, cutting, or improper lubrication
- 予防だ:
- Inspect seals before installation
- Lubricate with approved grease
- Install carefully (no sharp tools)
- Detection:
- Visual inspection before assembly
- Leak testing (if applicable)
Error 8: Incorrect Cable Bend Radius
- Symptom: Insulation damage, eventual failure
- Cause: Cable bent too tightly during installation
- 予防だ:
- Know minimum bend radius (typically 10-15× cable diameter)
- Use cable rollers and guides
- Train personnel on handling
- Detection:
- Visual inspection during installation
- Measure bend radius
Error 9: Inadequate Cleaning
- Symptom: Contamination, tracking, eventual failure
- Cause: Rushed cleaning, wrong cleaning agent
- 予防だ:
- Use proper cleaning agents (isopropyl alcohol)
- Use lint-free wipes
- Allow adequate time for cleaning
- Detection:
- Visual inspection (clean, no residue)
- White glove test (for critical applications)
Error 10: Poor Documentation
- Symptom: Cannot trace issues, warranty problems
- Cause: Rushed documentation, incomplete records
- 予防だ:
- Use standardized checklists
- Complete documentation in real-time
- Review before leaving site
- Detection:
- Documentation audit
- Completeness check
Chapter 6: Troubleshooting Guide
6.1 Pre-Energization Issues
Problem: Insulation Resistance Below Minimum
| Possible Cause | Diagnostic Test | Corrective Action |
|---|---|---|
| Moisture in insulation | Dry with heat, retest | Replace if still low |
| Contamination on surface | Visual inspection, clean | Clean with alcohol, retest |
| Damaged insulation | Visual inspection, PD test | Replace connector |
| Test equipment fault | Test on known good cable | Calibrate/replace equipment |
Problem: High Contact Resistance
| Possible Cause | Diagnostic Test | Corrective Action |
|---|---|---|
| Poor crimp | Crimp dimension check | Re-crimp or replace |
| Contaminated contacts | Visual inspection | Clean or replace |
| Incomplete insertion | X-ray or disassembly | Replace connector |
| Wrong conductor size | Measure conductor | Replace with correct size |
Problem: Partial Discharge Above Limit
| Possible Cause | Diagnostic Test | Corrective Action |
|---|---|---|
| Voids in insulation | PD mapping, visual | Replace connector |
| Contamination | Visual inspection | Clean or replace |
| Damaged stress control | Visual inspection | Re-apply stress control |
| Sharp edges | Visual inspection | Smooth edges or replace |
6.2 Post-Energization Issues
Problem: Overheating During Load
| Possible Cause | Diagnostic Test | Corrective Action |
|---|---|---|
| High contact resistance | IR thermography, resistance | Replace connector |
| Overload condition | Current measurement | Reduce load or upgrade |
| Poor ventilation | Visual inspection | Improve cooling |
Problem: Leakage Current
| Possible Cause | Diagnostic Test | Corrective Action |
|---|---|---|
| Moisture ingress | Insulation resistance | Dry or replace |
| Contamination | Visual inspection | Clean or replace |
| Damaged insulation | Visual inspection, PD | Replace connector |
Problem: Intermittent Connection
| Possible Cause | Diagnostic Test | Corrective Action |
|---|---|---|
| Loose connection | Visual inspection, torque check | Re-torque or replace |
| Damaged conductor | Visual inspection | Replace connector |
| Vibration issue | Visual inspection | Add strain relief |
Chapter 7: Safety Requirements
7.1 HV Safety Procedures
Lock-Out/Tag-Out (LOTO):
- Identify all energy sources
- Notify affected personnel
- Shut down equipment
- Isolate energy sources
- Apply LOTO devices
- Verify zero energy state
- Complete work
- Remove LOTO devices
- Restore equipment
Arc Flash Protection:
- Determine arc flash boundary (per NFPA 70E or local standard)
- Wear appropriate PPE within boundary
- Use insulated tools
- Maintain safe working distances
- Have emergency response plan
Working with De-Energized Equipment:
- Verify de-energized state (test before touch)
- Ground conductors before working
- Use appropriate PPE
- Work with partner (buddy system)
7.2 Offshore Safety
Vessel Safety:
- Complete vessel safety induction
- Know emergency procedures
- Wear life jacket on deck
- Follow helicopter safety procedures (if applicable)
Diving Safety:
- Complete dive plan and risk assessment
- Verify diving equipment certification
- Maintain communication with surface
- Follow decompression procedures
- Have standby diver ready
ROV Safety:
- Establish exclusion zone during ROV operations
- Verify ROV is rated for depth
- Monitor ROV position and status
- Have recovery plan for stuck ROV
結論
High-voltage underwater connector installation requires careful planning, skilled personnel, proper tools, and rigorous quality control. Following the procedures in this guide will help ensure safe, reliable installations that meet the 25+ year design life expected of offshore wind and subsea power systems.
Key Takeaways:
- Planning is critical: Complete all pre-installation checks before starting work
- Training matters: Only qualified personnel should perform HV installations
- Quality control: Implement hold points and witness points throughout
- Documentation: Complete records enable traceability and troubleshooting
- Safety first: HV and offshore work require strict safety procedures
Call to Action
Need Technical Support for HV Connector Installation?
HYSF Subsea provides comprehensive support for 33-66kV underwater connector installations:
- ✅ Free installation training (factory or on-site)
- ✅ Detailed installation manuals and videos
- ✅ On-site supervision for first installation
- ✅ 24/7 technical support hotline
- ✅ Fast replacement for defective products
Contact Us:
– 📧 Email: info@hysfsubsea.com
– 📞 Phone: +86 13942853869
– 🌐 Website: https://hysfsubsea.com
Download Resources:
– 33-66kV Connector Installation Manual (PDF)
– Installation Checklist (Excel)
– Troubleshooting Guide (PDF)
Document Information:
– Version: 1.0
– Published: March 7, 2026
– Next Review: September 2026
– Word Count: ~3,800 words
This guide is for informational purposes only. Always follow manufacturer-specific installation instructions and applicable safety regulations. Contact HYSF Subsea for application-specific guidance.


