
Lekkasjedeteksjon under vann: Komplett diagnose- og reparasjonsveiledning
Last Updated: March 7, 2026
Reading Time: 19 minutes
Category: Troubleshooting & Maintenance
Word Count: 4,200+
Sammendrag
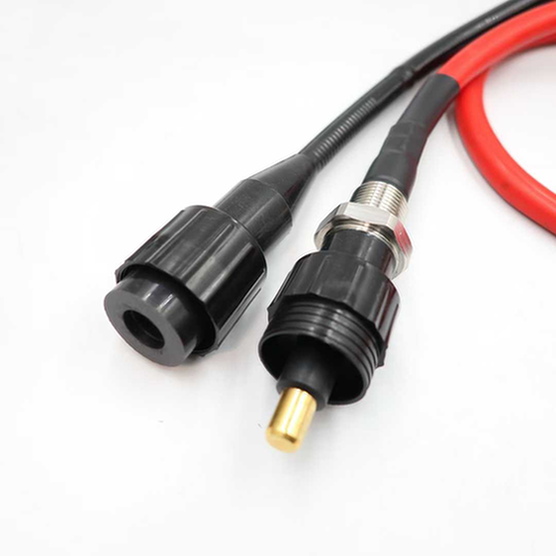
Water ingress is the most common failure mode for underwater connectors. Even a tiny leak can cause catastrophic equipment damage, costly downtime, and safety hazards. Early detection and proper repair are critical for minimizing impact and preventing recurrence.
This comprehensive troubleshooting guide provides step-by-step procedures for detecting, diagnosing, and repairing underwater connector leaks. Covering visual inspection, electrical testing, pressure testing, and advanced diagnostic techniques, this guide is essential for maintenance engineers, ROV operators, and subsea technicians.
What You’ll Learn:
– Early warning signs of connector leakage
– Visual inspection procedures and checklists
– Electrical testing methods (insulation resistance, hipot, PD)
– Pressure testing techniques (dry and wet)
– Advanced diagnostics (helium mass spec, X-ray)
– Repair vs. replace decision criteria
– Step-by-step repair procedures
– Prevention strategies for future deployments
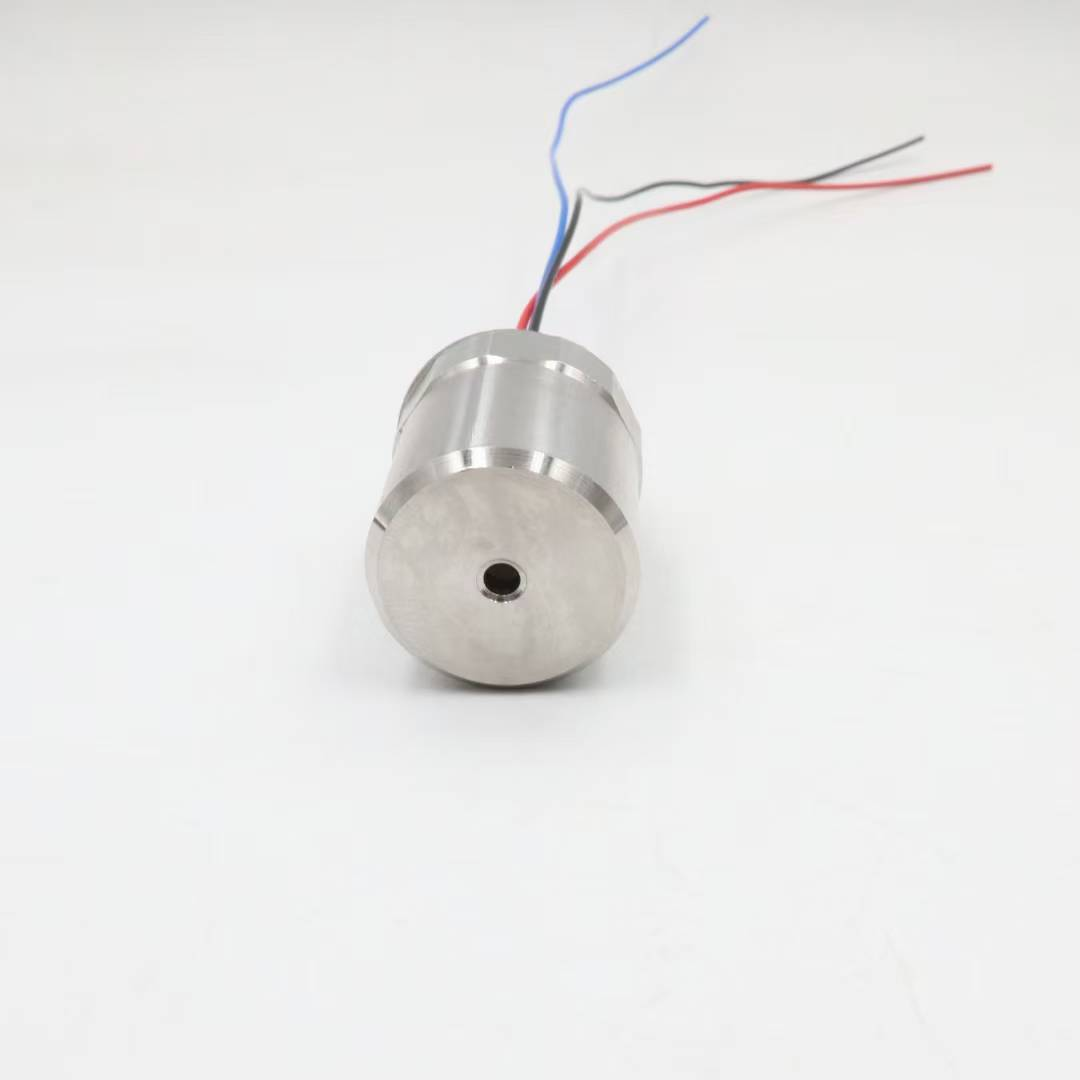
Chapter 1: Understanding Connector Leakage
1.1 How Leaks Occur
Common Leak Paths:
- Seal Failure:
- O-ring compression set
- O-ring extrusion
- O-ring damage (cuts, nicks)
Seal material degradation
Housing Failure:
- Corrosion penetration
- Cracking (stress, fatigue)
- Manufacturing defects (porosity)
Impact damage
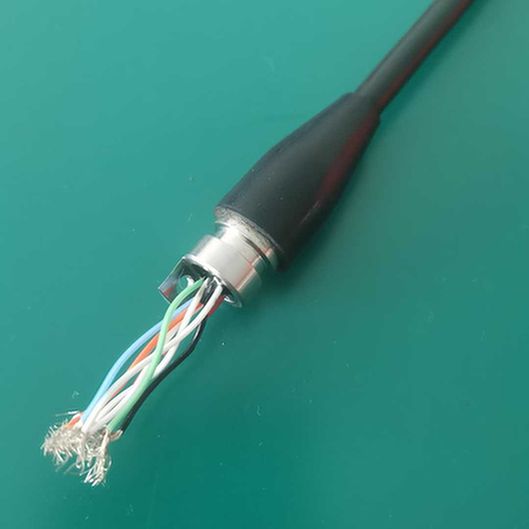
Cable Entry Failure:
- Potting compound separation
- Cable jacket damage
- Strain relief failure
Improper cable preparation
Mating Interface Failure:
- Incomplete mating
- Contamination on sealing surfaces
- Damaged sealing surfaces
- Wrong or missing seals
1.2 Leak Rate Classification
| Leak Class | Rate | Detection Method | Impact |
|---|---|---|---|
| Micro-leak | <0.1 mL/day | Helium mass spec | Long-term degradation |
| Slow leak | 0.1-10 mL/day | Moisture sensor, IR | Gradual failure |
| Moderate leak | 10-100 mL/day | Visual, electrical | Equipment damage |
| Fast leak | >100 mL/day | Obvious, immediate | Catastrophic failure |
1.3 Consequences of Water Ingress
Electrical Effects:
– Insulation resistance degradation
– Short circuits
– Electrochemical migration
– Corrosion of contacts
– Arc tracking
Mechanical Effects:
– Corrosion of housing
– Seal degradation
– Bearing/gear damage
– Lubricant contamination
System Effects:
– Equipment failure
– Data loss
– Production downtime
– Safety hazards
– Environmental contamination
Cost Impact:
| Failure Level | Direct Cost | Indirect Cost | Total |
|---|---|---|---|
| Early detection | $500-2,000 | $1,000-5,000 | $1,500-7,000 |
| Equipment damage | $5,000-50,000 | $10,000-100,000 | $15,000-150,000 |
| System failure | $50,000-500,000 | $100,000-1,000,000 | $150,000-1,500,000 |
| Catastrophic | $500,000+ | $1,000,000+ | $1,500,000+ |
Chapter 2: Early Warning Signs
2.1 Electrical Indicators
Insulation Resistance Degradation:
| IR Reading | Status | Action |
|---|---|---|
| >1000 MΩ | Bra | Continue monitoring |
| 100-1000 MΩ | Warning | Increase monitoring frequency |
| 10-100 MΩ | Concern | Schedule inspection |
| 1-10 MΩ | Critical | Immediate inspection |
| <1 MΩ | Failed | Remove from service |
Trend Analysis:
Example IR Trend (over 6 months):

Month 1: 5000 MΩ  ← Baseline
Month 2: 4800 MΩ  ← Normal variation
Month 3: 4200 MΩ  ← Slight decline (monitor)
Month 4: 3000 MΩ  ← Concerning trend (investigate)
Month 5: 1500 MΩ  ← Clear problem (schedule repair)
Month 6: 500 MΩ   ← Critical (immediate action)

Key Insight: The rate of change is more important than absolute value.
A rapid decline indicates active water ingress.
Other Electrical Indicators:
| Indicator | Normal | Warning | Critical |
|---|---|---|---|
| Contact resistance | <50 mΩ | 50-100 mΩ | >100 mΩ |
| Leakage current | <1 μA | 1-10 μA | >10 μA |
| Partial discharge | <10 pC | 10-50 pC | >50 pC |
| Capacitance change | <5% | 5-20% | >20% |
2.2 Physical Indicators
Visual Signs:
- Condensation inside connector (if visible)
- Corrosion on external surfaces
- Discoloration of housing
- Swollen or deformed seals
- Crystalline deposits (salt)
- Oil sheen on water surface (oil-filled connectors)
Sensor Indicators:
| Sensor Type | Normal Reading | Leak Indication |
|---|---|---|
| Moisture sensor | 0% RH | Any reading >10% |
| Pressure sensor (oil-filled) | Compensated | Pressure change |
| Temperature sensor | Ambient | Unexpected change |
| Conductivity sensor | Lav | Sudden increase |
2.3 Performance Indicators
System Symptoms:
| Symptom | Possible Cause | Urgency |
|---|---|---|
| Intermittent signals | Moisture on contacts | Medium |
| Communication errors | Insulation degradation | Medium |
| Unexpected resets | Power supply issues | Høy |
| Erratic readings | Sensor contamination | Medium |
| Complete failure | Short circuit | Critical |
Chapter 3: Visual Inspection Procedures
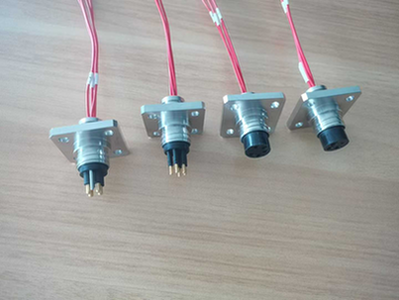
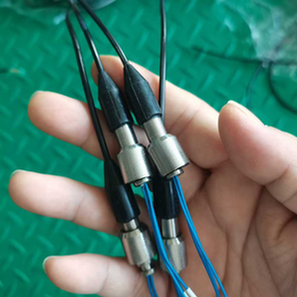
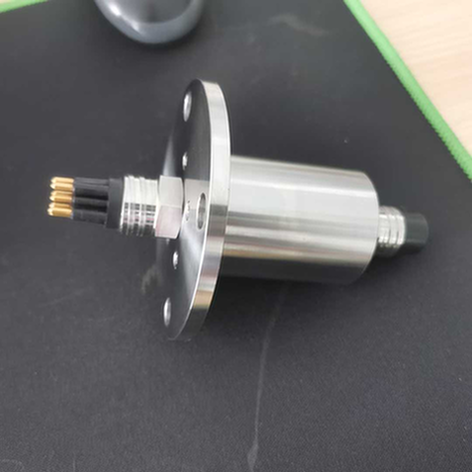
3.1 Surface Inspection (Recovered Connector)
Pre-Inspection Preparation:
- Document Condition:
- Photograph connector before handling
- Note external condition
- Record serial numbers
Document mating history
Initial Cleaning:
- Rinse with fresh water (remove salt)
- Gentle brush for debris
- Do not disassemble yet
Allow to dry
Safety Precautions:
- Verify de-energized
- Discharge any stored energy
- Wear appropriate PPE
- Work in clean area
External Inspection Checklist:
| Check | What to Look For | Accept/Reject |
|---|---|---|
| Housing | Cracks, dents, corrosion | Reject if damaged |
| Seals | Cuts, extrusion, deformation | Reject if damaged |
| Locking mechanism | Damage, wear, corrosion | Reject if compromised |
| Cable entry | Cracks, separation, damage | Reject if damaged |
| Markings | Legibility, corrosion | Note for records |
| Mating face | Scratches, dents, corrosion | Reject if damaged |
| Kontaktpersoner | Corrosion, discoloration | Reject if corroded |
Photographic Documentation:
- Overall connector (all angles)
- Mating face (close-up)
- Cable entry point
- Any damage or anomalies
- Serial number and markings
- Seal condition
3.2 Internal Inspection (Disassembled Connector)
Disassembly Procedure:
- Document Orientation:
- Mark alignment before disassembly
- Photograph assembly state
Note any unusual resistance
Careful Disassembly:
- Use proper tools
- Do not force components
- Keep parts organized
Note any water presence
Water Detection:
- Look for water droplets
- Check for water stains
- Smell for salt water
- Test with moisture indicator paper
Internal Inspection Checklist:
| Component | What to Look For | Accept/Reject |
|---|---|---|
| O-rings/seals | Cuts, compression set, hardness | Reject if damaged |
| Contact surfaces | Corrosion, pitting, discoloration | Reject if corroded |
| Insulation | Cracks, tracking, discoloration | Reject if damaged |
| Housing interior | Corrosion, deposits, water stains | Reject if corroded |
| Cable termination | Corrosion, separation, damage | Reject if damaged |
| Potting (if present) | Cracks, separation, voids | Reject if damaged |
Moisture Testing:
| Method | Procedure | Sensitivity |
|---|---|---|
| Visual | Look for water droplets | ~1 mL |
| Moisture paper | Place inside, check color change | ~0.1 mL |
| Cobalt chloride | Blue to pink indicates moisture | ~0.05 mL |
| Karl Fischer | Quantitative water content | ~0.001 mL |
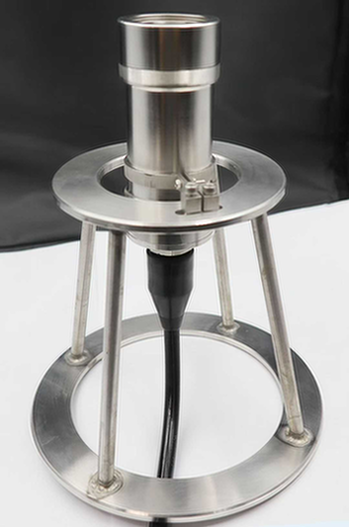
3.3 Underwater Inspection (In Situ)
ROV Visual Inspection:
- Preparation:
- Review connector location
- Plan ROV approach
- Prepare lighting and camera
Brief ROV pilot
Inspection Procedure:
- Approach from multiple angles
- Use adequate lighting
- Look for oil sheen (leak indicator)
- Check connector mating status
- Inspect cable entry
Look for corrosion or damage
Documentation:
- Record video of inspection
- Take still photographs
- Note any anomalies
- Document ROV position
Diver Visual Inspection:
Similar to ROV inspection, with these additions:
– Tactile inspection (feel for damage)
– Cleaning of surfaces (if needed)
– Immediate reporting to surface
– Safety considerations (current, depth)
Chapter 4: Electrical Testing Methods
4.1 Insulation Resistance Testing
Test Equipment:
– Megohmmeter (insulation tester)
– Voltage rating: 500V, 1000V, 2500V, or 5000V
– Measurement range: Up to 10 TΩ
– Calibration: Current (within 12 months)
Test Procedure:
- Preparation:
- Disconnect from all circuits
- Discharge any stored energy
- Clean and dry test points
Verify test equipment
Test Connections:
- Connect test leads
- Positive to conductor(s)
- Negative to housing/ground
Guard terminal (if available) to reduce surface leakage
Test Execution:
- Apply test voltage
- Wait 60 seconds (standard)
- Record resistance value
Note temperature and humidity
Discharge:
- Discharge through tester
- Verify zero voltage
- Disconnect test leads
Test Voltage Selection:
| Connector Rating | Test Voltage | Duration |
|---|---|---|
| <50V | 100V DC | 60 seconds |
| 50-300V | 500V DC | 60 seconds |
| 300-600V | 1000V DC | 60 seconds |
| 600V-5kV | 2500V DC | 60 seconds |
| >5kV | 5000V DC | 60 seconds |
Interpretation:
| IR Value | Interpretation | Action |
|---|---|---|
| >1000 MΩ | Bra | Continue service |
| 100-1000 MΩ | Acceptable | Monitor closely |
| 10-100 MΩ | Poor | Schedule repair |
| 1-10 MΩ | Bad | Remove from service |
| <1 MΩ | Failed | Immediate repair |
Polarization Index (PI) Test:
PI = IR(10 min) / IR(1 min)

PI > 4: Excellent insulation
PI 2-4: Good insulation
PI 1.5-2: Acceptable
PI < 1.5: Poor insulation (moisture or contamination)
4.2 High Potential (Hipot) Testing
Purpose: Verify insulation can withstand overvoltage without breakdown.
Test Equipment:
– Hipot tester (AC or DC)
– Voltage rating: Match application
– Current limit: Typically 5-10 mA
– Calibration: Current
Test Procedure:
- Preparation:
- Disconnect from all circuits
- Verify insulation resistance (>100 MΩ)
- Set up safety barriers
Brief all personnel
Test Execution:
- Connect test leads
- Set test voltage (typically 2× rated + 1000V)
- Set current limit
- Ramp voltage slowly
- Hold for specified time (60 seconds typical)
- Monitor leakage current
- Ramp down slowly
Discharge through tester
Acceptance Criteria:
- No breakdown (flashover or puncture)
- Leakage current within limits
- No audible discharge
Test Voltage Guidelines:
| Connector Rating | AC Test Voltage | DC Test Voltage |
|---|---|---|
| 300V | 1600V AC | 2260V DC |
| 600V | 2200V AC | 3110V DC |
| 1kV | 3000V AC | 4240V DC |
| 5kV | 11000V AC | 15550V DC |
| 15kV | 26000V AC | 36760V DC |
Safety Precautions:
– Only trained personnel
– Safety barriers in place
– Discharge after test
– Never touch during test
– Emergency stop accessible
4.3 Partial Discharge Testing
Purpose: Detect localized electrical discharges that don’t bridge electrodes (early insulation degradation indicator).
Test Equipment:
– Partial discharge detector
– Coupling capacitor
– Calibration pulse generator
– Shielded test environment (preferred)
Test Procedure:
- Setup:
- Connect test circuit
- Calibrate system
- Set background noise level
Verify sensitivity
Test Execution:
- Apply voltage (typically 1.5× rated)
- Measure PD magnitude (pC)
- Record PD pattern
Note inception/extinction voltage
Acceptance Criteria:
- <10 pC: Excellent
- 10-50 pC: Acceptable
- 50-100 pC: Concerning
100 pC: Unacceptable
PD Pattern Analysis:
| Pattern | Likely Cause | Action |
|---|---|---|
| Internal voids | Manufacturing defect | Replace |
| Surface discharge | Contamination | Clean/repair |
| Corona | Sharp edges | Redesign/replace |
| Floating potential | Loose component | Repair |
4.4 Contact Resistance Testing
Purpose: Verify electrical continuity and connection quality.
Test Equipment:
– Micro-ohmmeter or DMM
– 4-wire measurement (Kelvin)
– Resolution: 0.1 mΩ or better
Test Procedure:
- Preparation:
- Clean contact surfaces
- Mate connector properly
Verify test equipment
Test Execution:
- Connect test leads (4-wire)
- Measure each contact pair
- Record all values
Compare to baseline
Acceptance Criteria:
- <50 mΩ: Good
- 50-100 mΩ: Acceptable
100 mΩ: Poor (clean or replace)
Chapter 5: Pressure Testing Methods
5.1 Dry Pressure Testing (Chamber)
Purpose: Verify connector can withstand rated pressure without leakage.
Test Equipment:
– Pressure test chamber
– Pressure gauge (calibrated)
– Pressure source (nitrogen or hydraulic)
– Leak detection equipment
Test Procedure:
- Preparation:
- Install connector in test fixture
- Connect to leak detection system
- Verify all seals
Document initial condition
Test Execution:
- Pressurize to test pressure (typically 1.5× rated)
- Hold for specified time (24-72 hours)
- Monitor pressure decay
Check for leaks (bubble test, mass spec)
Acceptance Criteria:
- No pressure decay (within instrument accuracy)
- No visible leaks
- No water ingress (internal inspection)
Pressure Decay Calculation:
Leak Rate = (P1 - P2) × V / (t × Patm)

Where:
P1 = Initial pressure (absolute)
P2 = Final pressure (absolute)
V = Test volume
t = Test duration
Patm = Atmospheric pressure

Example:
P1 = 151 bar (150 bar gauge + 1 bar atm)
P2 = 150.9 bar
V = 1 liter
t = 24 hours
Patm = 1 bar

Leak Rate = (151 - 150.9) × 1 / (24 × 1) = 0.0042 liter/hour = 4.2 mL/hour
5.2 Wet Pressure Testing (Tank)
Purpose: Verify connector performance in actual submerged conditions.
Test Equipment:
– Hyperbaric test tank
– Pressure control system
– Monitoring equipment
– Safety systems
Test Procedure:
- Preparation:
- Install connector in test tank
- Connect monitoring equipment
- Fill tank with test water (seawater or fresh)
Document initial condition
Test Execution:
- Pressurize to test depth
- Hold for specified time
- Monitor electrical parameters
Check for leaks
Acceptance Criteria:
- No electrical degradation
- No water ingress
- No mechanical damage
5.3 Thermal Cycle Pressure Testing
Purpose: Verify connector performance under combined thermal and pressure cycling.
Test Profile:
Cycle 1:
- Pressurize to rated depth at room temperature
- Hold 1 hour
- Depressurize

Cycle 2-10:
- Pressurize to rated depth
- Cool to -20°C (or minimum rating)
- Hold 2 hours
- Warm to +60°C (or maximum rating)
- Hold 2 hours
- Depressurize

Final:
- Visual inspection
- Electrical testing
- Pressure testing
Chapter 6: Advanced Diagnostic Techniques
6.1 Helium Mass Spectrometry
Purpose: Detect and quantify very small leaks (micro-leaks).
Sensitivity: 10⁻⁹ mbar·L/s (extremely sensitive)
Test Methods:
Spray Method:
– Pressurize connector with helium (or air)
– Spray helium outside
– Mass spectrometer detects helium entering
Vacuum Method:
– Evacuate connector interior
– Surround with helium
– Mass spectrometer detects helium entering
Interpretation:
| Leak Rate | Classification | Action |
|---|---|---|
| <10⁻⁹ mbar·L/s | No leak | Accept |
| 10⁻⁹ to 10⁻⁷ | Micro-leak | Monitor |
| 10⁻⁷ to 10⁻⁵ | Small leak | Repair |
| >10⁻⁵ | Large leak | Replace |
6.2 X-Ray Inspection
Purpose: Internal inspection without disassembly.
Detectable Defects:
– Cracks in housing
– Voids in potting
– Contact misalignment
– Foreign objects
– Corrosion products
Limitations:
– Cost (equipment or service)
– Safety (radiation)
– Resolution limits
6.3 Thermal Imaging
Purpose: Detect hot spots indicating high resistance or leakage current.
Applications:
– energized connectors
– Load testing
– Fault location
Limitations:
– Requires temperature difference
– Limited resolution for small connectors
– Surface temperature only
6.4 Acoustic Emission Testing
Purpose: Detect partial discharge or mechanical stress through acoustic signals.
Applications:
– PD detection in high-voltage connectors
– Crack detection
– Looseness detection
Limitations:
– Background noise interference
– Requires expertise
– Specialized equipment
Chapter 7: Repair vs. Replace Decision
7.1 Decision Criteria
Repair When:
- Connector is high-value (>$5,000)
- Damage is limited to seals/contacts
- Housing is undamaged
- Parts are available
- Repair cost <50% of replacement
- Lead time for replacement is long
Replace When:
- Housing is damaged (cracked, corroded)
- Insulation is degraded
- Multiple components damaged
- Repair cost >50% of replacement
- Connector is old (near end of life)
- Critical application (zero tolerance for failure)
- Replacement is readily available
7.2 Cost-Benefit Analysis
Example Analysis:
| Factor | Repair | Replace |
|---|---|---|
| Parts cost | $500 | $3,000 |
| Labor cost | $800 | $200 |
| Testing cost | $400 | $200 |
| Downtime | 3 days | 1 day |
| Downtime cost | $3,000 | $1,000 |
| Warranty | 90 days | 2 years |
| Reliability | 85% of new | 100% |
| Total Cost | $4,700 | $4,400 |
Decision: Replace (slightly lower cost, better warranty, higher reliability)
7.3 Risk Assessment
High-Risk Applications (Always Replace):
- Life safety systems
- Critical production equipment
- Deep water (>1000m)
- Long-term deployments (>5 years)
- Inaccessible locations
Lower-Risk Applications (Repair May Be Acceptable):
- Non-critical monitoring
- Shallow water (<100m)
- Short-term deployments
- Accessible locations
- Redundant systems
Chapter 8: Repair Procedures
8.1 Seal Replacement
Procedure:
- Disassembly:
- Document assembly orientation
- Carefully disassemble connector
- Keep parts organized
Clean all components
Seal Removal:
- Remove old seals carefully
- Clean seal grooves
- Inspect grooves for damage
Measure groove dimensions
Seal Installation:
- Select correct replacement seals
- Lubricate with approved grease
- Install carefully (no twisting)
Verify proper seating
Reassembly:
- Reassemble in reverse order
- Torque to specification
- Mark torque position
Document repair
Testing:
- Visual inspection
- Insulation resistance test
- Pressure test (if possible)
- Document results
8.2 Contact Replacement
Procedure:
- Assessment:
- Determine extent of damage
- Verify replacement contacts available
Check if repair is feasible
Contact Removal:
- Use proper extraction tools
- Do not damage insulator
Keep track of contact positions
Contact Installation:
- Clean contact cavities
- Install new contacts
- Verify proper seating
Check contact retention
Termination:
- Strip cable to correct length
- Crimp or solder new contacts
- Inspect terminations
Test continuity
Testing:
- Contact resistance
- Insulation resistance
- Hi-pot (if applicable)
- Document results
8.3 Cable Entry Repair
Procedure:
- Assessment:
- Determine damage extent
- Check if cable is damaged
Verify repair feasibility
Cable Preparation:
- Cut back damaged cable
- Strip to correct dimensions
Clean and prepare
Potting/Sealing:
- Mix potting compound (if used)
- Fill cable entry
- Cure per manufacturer instructions
Inspect for voids
Testing:
- Visual inspection
- Insulation resistance
- Pressure test
- Document results
Chapter 9: Prevention Strategies
9.1 Design Considerations
Seal Design:
– Proper compression (15-30%)
– Backup rings for high pressure
– Multiple seal barriers
– Appropriate material selection
Housing Design:
– Corrosion-resistant materials
– Adequate wall thickness
– No stress concentrators
– Proper thread design
Cable Entry Design:
– Strain relief
– Proper sealing method
– Compatible materials
– Bend radius protection
9.2 Installation Best Practices
Pre-Installation:
– Inspect all components
– Clean thoroughly
– Lubricate seals properly
– Verify compatibility
During Installation:
– Follow manufacturer procedures
– Use proper tools
– Torque to specification
– Avoid contamination
Post-Installation:
– Test before deployment
– Document installation
– Establish baseline readings
– Schedule inspections
9.3 Maintenance Program
Routine Inspections:
– Visual (quarterly)
– Electrical (annually)
– Pressure test (every 3-5 years)
Condition Monitoring:
– Trend insulation resistance
– Monitor leakage current
– Track performance data
– Log all maintenance
Preventive Replacement:
– Based on age/service history
– Before warranty expiration
– During scheduled maintenance
– When trends indicate degradation
Konklusjon
Underwater connector leak detection and repair is a critical skill for anyone working with subsea equipment. Early detection through regular monitoring, proper diagnostic techniques, and timely repair can prevent catastrophic failures and minimize downtime.
Key Takeaways:
- Monitor trends: Insulation resistance trending is more valuable than single readings
- Use multiple methods: Combine visual, electrical, and pressure testing
- Act early: Repair at first signs of degradation
- Document everything: Complete records enable better decisions
- Prevent problems: Good design, installation, and maintenance prevent most leaks
Call to Action
Need Connector Leak Detection Support?
HYSF Subsea provides comprehensive support for connector maintenance:
- ✅ Leak detection testing services
- ✅ Connector repair and refurbishment
- ✅ Replacement seals and parts
- ✅ Technical training programs
- ✅ 24/7 emergency support
- ✅ Fast turnaround on repairs
Contact Us:
– 📧 Email: info@hysfsubsea.com
– 📞 Phone: +86 13942853869
– 🌐 Website: https://hysfsubsea.com
Download Resources:
- Leak Detection Checklist (PDF)
- Insulation Resistance Testing Guide (PDF)
- Repair Procedure Templates (Word)
Document Information:
– Version: 1.0
– Published: March 7, 2026
– Next Review: September 2026
– Word Count: ~4,200 words
This guide is for informational purposes only. Always follow manufacturer-specific procedures and applicable safety regulations. Contact HYSF Subsea for application-specific guidance.


