Ir al contenido

Respuesta rápida: Most leaks (80%+) are installation-related, not quality defects. Common causes: O-ring damaged/pinched, insufficient torque, debris on sealing surface, O-ring not lubricated, cable not properly potted. Troubleshooting steps: 1) Inspect O-ring for damage, 2) Check sealing surfaces for debris, 3) Verify proper torque, 4) Check cable potting. If all correct and still leaking, contact us – may be warranty claim. We’ll help diagnose and resolve quickly.
Connector Leak Troubleshooting
Quick Diagnostic Flowchart
Step 1: When did leak start?
- First use → Likely installation issue
- After many uses → Likely wear/maintenance issue
- After impact/damage → Likely physical damage
Step 2: Where is leak occurring?
- At mating interface → O-ring issue
- At cable entry → Potting issue
- Through housing → Crack/damage
Step 3: Visual inspection
- O-ring visible damage? → Replace O-ring
- Debris on surfaces? → Clean thoroughly
- Housing cracked? → Replace connector
Most Common Leak Causes (80%+ of cases)
1. O-Ring Issues (40% of leaks)
Problemas:
- O-ring pinched during assembly
- O-ring cut or nicked
- O-ring dried out/hardened
- O-ring not seated in groove
- O-ring wrong size
Solutions:
- Replace O-ring (use correct size)
- Lubricate with silicone grease
- Ensure proper seating in groove
- Don’t over-stretch during installation
2. Insufficient Torque (20% of leaks)
Problem: Connector not tightened enough
Solución:
- Hand-tight plus 1/4 to 1/2 turn
- Use torque wrench if specified
- Typical torque: 2-5 Nm (check specs)
- Don’t overtighten (can damage O-ring)
3. Debris on Sealing Surface (15% of leaks)
Problemas:
- Sand/dirt on O-ring or mating surface
- Salt crystals on threads
- Old lubricant hardened
- Cable strands protruding
Solutions:
- Clean thoroughly with fresh water
- Use soft brush for stubborn debris
- Wipe with lint-free cloth
- Inspect before mating
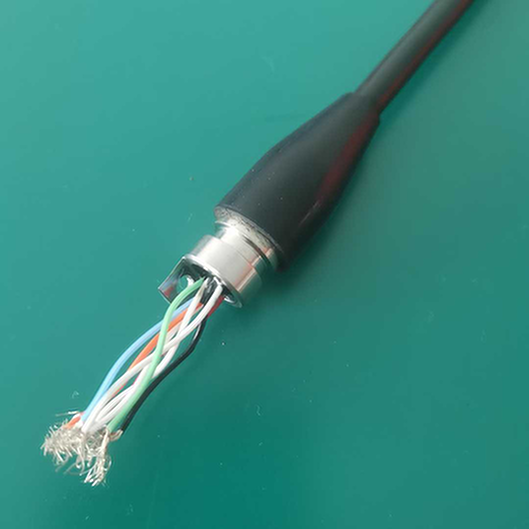
4. Cable Potting Issues (10% of leaks)
Problemas:
- Insufficient epoxy
- Air bubbles in potting
- Epoxy didn’t cure properly
- Cable moved before epoxy cured
Solutions:
- Re-pot with fresh epoxy
- Ensure complete fill (no voids)
- Follow epoxy cure instructions
- Secure cable during cure
5. Wear and Tear (5% of leaks)
Problemas:
- O-ring compressed set (flattened)
- Thread wear
- Sealing surface scratches
Solutions:
- Replace O-rings regularly (annual)
- Inspect threads for damage
- Replace connector if housing damaged
Step-by-Step Leak Diagnosis
Step 1: Visual Inspection (5 minutes)
- Disassemble connector carefully
- Remove O-ring
- Inspect O-ring under good light (use magnifier if available)
- Look for: cuts, nicks, flattening, hardness
- Inspect sealing surfaces for scratches, debris
- Check threads for damage
Step 2: O-Ring Test (2 minutes)
- Stretch O-ring gently 10-20%
- Look for cracks appearing
- Check if it returns to original shape
- If cracked or doesn’t recover → Replace
Step 3: Cleaning (5 minutes)
- Rinse all parts with fresh water
- Use soft brush for stubborn debris
- Wipe with lint-free cloth
- Ensure completely dry before reassembly
Step 4: Reassembly (10 minutes)
- Install new O-ring (lubricated with silicone grease)
- Ensure O-ring seated properly in groove
- Assemble connector halves
- Torque to specification (hand-tight + 1/4 turn)
- Don’t overtighten!
Step 5: Testing (varies)
Basic test (if no pressure chamber):
- Submerge in water bucket
- Fíjate si hay burbujas de aire (indican una fuga)
- Leave for 30 minutes minimum
- Check internally for moisture
Professional test (if equipment available):
- Pressure test to rated depth
- Hold for 24 hours
- Check for pressure drop
- Inspect internally after test
When It’s a Quality Issue
Less than 20% of leaks are quality defects. Signs include:
- 🔴 Housing crack or defect (visible)
- 🔴 Thread damage from manufacturing
- 🔴 Contact corrosion (internal, not from water ingress)
- 🔴 O-ring groove dimensionally incorrect
- 🔴 Leak on first use with proper installation
If you suspect quality issue:
- Document with photos
- Note installation steps taken
- Contact [email protected]
- Include: Part number, purchase date, photos
- We’ll evaluate and respond within 24 hours
Warranty Coverage
Covered:
- ✅ Manufacturing defects
- ✅ Material failures
- ✅ Workmanship issues
Not Covered:
- ❌ Installation errors
- ❌ Improper maintenance
- ❌ Physical damage (drops, impacts)
- ❌ Normal wear (O-rings)
- ❌ Operation beyond specifications
Preventing Future Leaks
Buenas prácticas
- ✅ Inspect O-rings before every use
- ✅ Replace O-rings annually (or every 50-100 cycles)
- ✅ Lubricate O-rings with silicone grease
- ✅ Keep sealing surfaces clean
- ✅ Use proper torque (don’t overtighten)
- ✅ Store with protective caps
- ✅ Rinse with fresh water after each use
Maintenance Schedule
| Frequency | Action |
|---|---|
| Every use | Visual inspection, rinse with fresh water |
| Mensual | Detailed O-ring inspection, clean sealing surfaces |
| Annually | Replace O-rings, full inspection |
| After any leak | Complete diagnosis, replace damaged parts |
Need Help?
Leak troubleshooting can be frustrating. We’re here to help:
- 📧 Email: [email protected]
- 📎 Include: Photos, part number, description of issue
- 📞 Phone: +86 13942853869
- 💬 Live chat: Available on our website
Tiempo de respuesta: Within 24 hours (often same day)
Related: Guía de instalación | Contact Support
Having leak issues? Email [email protected] with photos and details.